A Way of Life in the USA
Hunting is a way of life in the United States, and we are here to help you be as successful on the hunt as possible.
Category Archives for Venison Recipes

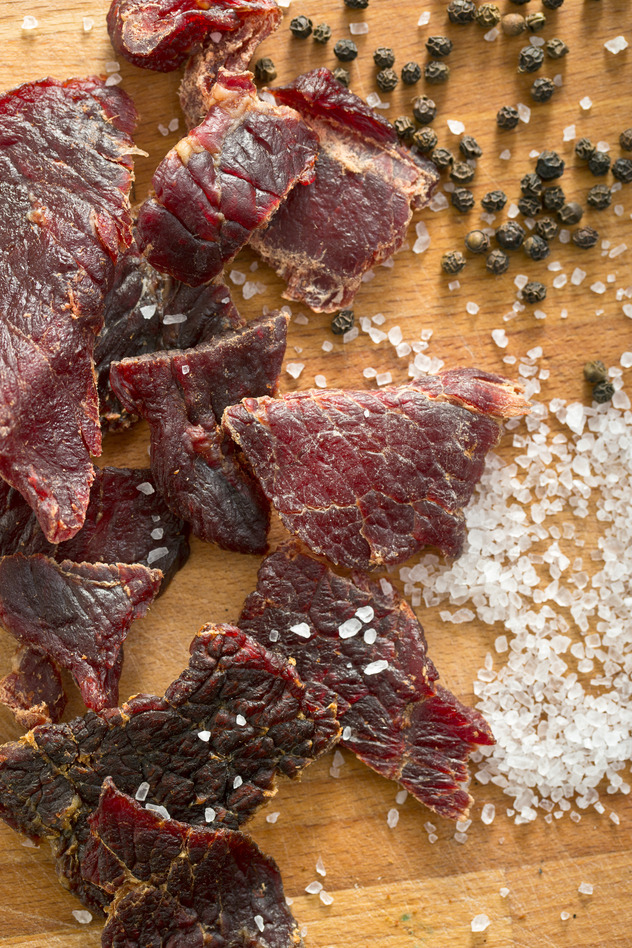
How to Make Deer Jerky (Plus 11 Recipes)
Sometimes after a particularly good deer hunt, you find you have much more meat than your family can eat. One simple and tasty solution is to make jerky out of the leftover deer meat. Jerky has been used as a preservation method for centuries and has only improved since, as this article will show. This article will outline some preparation methods, what equipment to use, how to save jerky that’s too dry and how to store your deer jerky when it’s done. There are also some delicious recipes at the end of the article if you just want to dive right in. If you want to know the secret to the best tasting deer jerky you’ll ever eat, however, keep reading.
Contents
Ground versus Sliced Meat
There are two kinds of deer jerky: deer jerky made with ground meat and deer jerky made with solid, lean muscle. The best deer jerky comes from the deer’s hind quarters, particularly where you would get the round steak from. The top round, bottom round and eye of round are all excellent candidates for deer jerky. The difference, however, is that you need to cut the meat with the grain of the rest of the meat for jerky, rather than against the grain as you would for steak. This gives it the chewy consistency you would expect from jerky. To make the meat a little easier to cut, try cutting it while it is still partially frozen.
Ground meat jerky, on the other hand, is made from very lean ground deer meat that mixed with your desired spices and then pressed and formed into the desired shape, making it excellent for any leftover meat you may have. You can use a jerky gun, which is essentially a caulking gun with a wide tip, or a rolling pin to roll the ground meat to the thickness you want it and help form the ground meat into strips before cooking. For best results, you will need to make this kind of jerky with a dehydrator, but it is still possible to make it in an oven or a smoker if you don’t have one.
The Jerky Gun Method
To use a jerky gun to turn your ground venison into deer jerky, fist pack the ground meat tightly into the jerky gun’s chamber, ensuring there is little to no air inside. Next, squirt the ground meat onto the dehydrator racks directly, leaving a small space between each strip. Once all the ground meat is used, set your dehydrator to 145 degrees and cook for about six hours. Don’t just forget about it completely, though. Come back after about two and a half hours and spin the dehydrator’s racks, placing the front of the racks in the back of the dehydrator. If you find any strips of jerky that are done, take them out and leave the rest to finish cooking.
The Rolling Pin Method
If you don’t have a jerky gun, a rolling pin is another way to form and press your ground venison into jerky. Again, you will need a dehydrator for best results. Place your ground deer meat between two sheets of wax paper, then roll it out with a rolling pin to the thickness you want. Place the rolled-out meat onto a cookie sheet and place it in the freezer for about an hour. This will make it easier to slice it into strips when you take it out of the freezer. After you slice them, you just put them into your dehydrator. Like before, set the dehydrator to 145 degrees Fahrenheit for 6 hours, come back and spin the racks after a couple of hours and take off any jerky strips that are done in between time. One thing to mention about rehydrating your deer jerky, however, is that it is better to eat it sooner rather than later, as this makes the jerky more likely to spoil.
 Essential Ingredients in any Recipe
Dehydrating your deer jerky isn’t as simple as just shoving it into a dehydrator or smoker. There are also four ingredients you need to facilitate the jerky’s drying process and make it last longer than a week. These four ingredients show up in nearly every deer jerky recipe regardless of whether you are working with sliced meat or ground meat. We’ll go over each them below and explain why each is important to making your jerky into something great.
Cure
Cures, which contain nitrates and nitrites, have been used since the Ancient Egyptians’ time to inhibit mold growth and kill off any botulism the meat may possess. They also naturally enhance the meat’s color, making it look even better than when you got it fresh. If you buy premade jerky spices, they likely already include cure, but it doesn’t hurt to check. If you add some yourself, you usually don’t need very much to get the job done. You typically only need about a quarter of a teaspoon per pound of meat. Cure is especially great for jerky, since it also inhibits bacterial growth during the cooking process.
Salt
Salt is not only a flavoring, but also a preservative utilized since time out of mind. You will need salt if you are working with raw, sliced meat because you will need to soak your meat in salt water 24 hours prior to making your jerky. This not only keeps the jerky tender, it also draws the blood out of the meat, keeping it moist and fresh. The best salt to use is canning salt because it contains no additives of any kind. Since most cures contain salt anyway, you may not need very much salt to begin with. You can find canning salt in just about any grocery store, usually in the baking aisle.
Spices
Spices may seem like a no-brainer, but some spices are actually more beneficial than others. Fresh garlic, for example, can kill off E. coli, Salmonella enteritidis and Staphylococcus aureus. Cayenne pepper, another favorite in deer jerky, can help relieve intestinal gas and prevent the formation of fungus. There are limitless combinations of spices you can use on your deer jerky, like red pepper flakes, sugar, molasses, Worcestershire sauce and even teriyaki sauce, but some spices have more health benefits and bacteria-killing properties than others. Don’t be afraid to play around with your own spice combinations, either.
Liquid Smoke
Liquid smoke is another potent flavoring with a variety of uses. They come in plenty of flavors, like mesquite or original, and do not require a lot to get great flavor out of them. Believe it or not, liquid smoke truly is smoke from burned hickory chips, mesquite chips or other hardwood that has been collected in a condenser. This is why liquid smoke is such a potent flavoring. You can use liquid smoke as a marinade, an ingredient in a sauce, or just offer it as a condiment. If you do use liquid smoke directly on your jerky when cooking, use only small amounts, as it can pool and become bitter if you use too much, ruining your deer jerky. In fact, it would probably be best to just brush it on like you would barbecue sauce to prevent pooling.
You can make it easy on yourself and try out a pre-made seasoning packet. Some goods ones are Nesco Jerky Spice Works and Hi Mountain Seasoning. Or, check out our recipes below.
Smokers vs. Dehydrators vs. Ovens
 No matter which method you choose, never leave your deer jerky unattended since it can turn to stone or burn to a crisp if you aren’t careful. Plan to devote several hours to making your deer jerky, especially if you have a lot of deer meat to use. Each batch can take from six to eight hours, so plan your day accordingly. Here are a few things to keep in mind with each method of making jerky, as well as some advantages and disadvantages.
In the Oven
Making jerky in the oven will likely use the most electricity, so keep this in mind. To make jerky in the oven successfully, you’ll need to set the oven to the lowest temperature and keep the oven door open slightly. Also make sure that the jerky pieces do not overlap, or else those overlapped pieces won’t dry properly. Making jerky in the oven also has the disadvantage of needing to keep the oven door open, which essentially means heating up your whole kitchen for six to eight hours.
In the Dehydrator
Making jerky in your dehydrator is a bit different. You will need to put your dehydrator on its highest setting, which is usually 145-155 degrees Fahrenheit. The dehydrator will take longer than your oven, at about eight hours of cooking time. Again, do not overlap the jerky pieces. With a dehydrator, you won’t have to worry about air circulation, since many dehydrator racks have small holes in them already. You also won’t have to worry about power consumption or heat, since most dehydrators fit on your countertop with no problem.
In the Smoker
Making jerky in your smoker is a bit trickier than the other two methods, but can be well worth it if done correctly. If you wish to add wood chips to your smoker to give your deer jerky some flavor, soak the wood chips in water about half an hour before cooking. This will prevent the wood chips from producing any smoke and changing the taste of the jerky. Adding the wood chips too soon can also cause a terrible-tasting liquid to pool on the surface of the jerky and ruin the taste.
When you are ready to begin, preheat your smoker to 180 degrees Fahrenheit and place the deer meat inside. Don’t add any wood chips or liquid smoke to the smoker just yet. Let the meat cook for about three hours, then, when it feel like slightly dried paint to the touch, add the wood chips you soaked earlier. Do your best to keep your smoker at 180 degrees Fahrenheit for best results. Also be sure to check on the jerky every hour to ensure the jerky is not too dry. If any of the jerky is to your liking, remove it.
The Unorthodox Method
 Believe it or not, you can also make deer jerky in the microwave. Slice and marinate your jerky, then take it out and hang the strips over a microwave roasting rack. Set the microwave on high, then cook for 4-6 minutes. Every 30 seconds after the 4 minute mark, stop the microwave and check on the jerky. The jerky is ready when it changes from brown to dark brown and has that leathery appearance. It’s unorthodox and it will obviously tie up your microwave for quite a while, but if the results are just as good, why not try it?
A Note on Sun Drying
Some people make jerky by leaving it to dry in the sun and, while it does get the job done, it is not a healthy way to make deer jerky. The reason is that the sunlight does not warm up the jerky enough to kill off harmful bacteria. Venison, unfortunately, is especially prone to contracting bacteria and even fecal material, so it is crucial to make sure the meat is cooked at no less than 150 degrees Fahrenheit. To avoid giving friends, family or potential customers food poisoning, it’s best to make deer jerky in an oven, a smoker or a dehydrator.
What if the Jerky is Too Dry?
If you dry out your jerky too much, it can still be saved, so don’t throw it away. You cannot reverse any burns, but you can at least make your jerky great again. All you need to do is place your jerky in a sandwich bag, preferably one with a zipper, with a tablespoon of water. Shake the bag to distribute the water evenly, seal it for about an hour, then open the bag just a little and let the jerky stand for a few more hours. You can also substitute the water with a little broth, milk, fruit juice or even a slice of bread. Most consumable liquids are safe to use for replenishing moisture in overcooked jerky, but water will not influence the original flavor.
Storage
To keep your deer jerky tasting great and lasting a long time, it’s best to keep it in the refrigerator in a paper bag or a glass jar. It can last up to a month in the refrigerator. Do not store jerky in a plastic bag unless you are going to freeze it. Otherwise, the plastic bag will promote mold growth because it traps moisture. If any of your deer jerky has mold on it, throw it out. If you have one, a vacuum sealer may not be a bad idea if you are planning to freeze your deer jerky. Otherwise, glass jars are your best bet.
USDA Food Safety Guidelines
If you plan to sell your deer jerky rather than eat it yourself, you may want to know the USDA food safety guidelines for preparing your jerky. It’s good information to know either way so that you don’t make jerky that will get people sick. This is important because deer meat is unfortunately very prone to contracting harmful bacteria.
- Before handling any kind of meat, wash your hands thoroughly with soap and water. It isn’t required, but handling deer meat with clean, disposable gloves isn’t a bad idea, either.
- All equipment and utensils must be clean. You may want to wash them before you start, just to make sure.
- Defrost any frozen meat in the refrigerator. Do not thaw it on your counter.
- If you use a marinade, marinate your deer meat in the refrigerator as well.
- In order to kill off harmful bacteria, cook your deer meat at or above 150 degrees Fahrenheit.
- Store your jerky in the refrigerator for two months at the most.
Recipes
 Here are some delicious deer jerky recipes to use the next time you make some deer jerky of your own. Although most deer jerky recipes call for sliced meat, the recipes are sorted by whether you need ground meat or sliced meat for your convenience. We recommend using the sliced meat recipes for when you have it and the ground meat recipes for when you’re trying to get rid of leftovers. All of the recipes are excellent, though.
Ground Deer Jerky Recipes
Ground Deer Meat Jerky
What you will need:
- 3 pounds of ground venison, thawed
- 3 tablespoons of canning salt
- Your favorite cure (follow the amount recommended on the box)
- 1 teaspoon of onion powder
- 2 teaspoons of garlic powder
- 1 ½ teaspoons of cracked pepper
- 1 teaspoon of liquid smoke
- 3 tablespoons of water
How to make it:
- Mix the cure, all of the spices and water in a large bowl.
- Add your ground venison and mix well for about five minutes.
- Pack the mixture into your jerky gun, ensuring there are no air pockets.
- Squirt the meat onto your wire racks, spacing each strip about ¼ of an inch apart.
- Heat your oven to 200 degrees Fahrenheit and place your racks on top of a drip pan, then place this in the oven.
- After about three hours, flip each jerky strip over and cook for another two or three hours.
- Make sure the strips are completely cooled before storing.
The Cook’s Deer Jerky Recipe
What you will need:
- 5 pounds of ground deer meat
- Your favorite cure (See instructions on box)
- 4 teaspoons of salt
- 2 teaspoons of garlic powder
- 1 teaspoon of red pepper
- 1 teaspoon of butter
- 1 tablespoon of black pepper
- 2 tablespoons of liquid smoke
- 2 tablespoons of Worcestershire sauce
How to make it:
- Mix all of the ingredients together and form into grapefruit-sized balls.
- Using the rolling pin method, put wax paper on both sides of the meat and roll to desired thickness.
- Take off the top piece of wax paper and put the bottom piece on a cookie sheet with the meat on it.
- Brush the meat with a blend of 4 tablespoons water and 4 tablespoons liquid smoke.
- Place the jerky in the oven at 150 degrees for two hours, then turn the strips over and bake for one more hour. When finished, cut the jerky into strips.
The Flexible Deer Jerky Recipe
What you will need:
- 5 pounds of ground deer meat
- Your favorite cure (check the box for detailed instructions)
- 9 teaspoons of salt
- 2 teaspoons of black pepper
- 2 teaspoons of garlic powder
- 1 teaspoon of cayenne pepper
- 1 ½ teaspoons of cardamom
- 1 teaspoon of marjoram
- 2 tablespoons of liquid smoke
- 2 tablespoons of water
How to make it:
- Mix ground meat with spices thoroughly.
- Roll the meat into one pound balls, then place each ball between two sheets of wax paper and roll to desired thickness with a rolling pin.
- Place the sheets of deer meat directly on your oven or dehydrator’s racks and bake between 150 and 200 degrees Fahrenheit.
* * * * *
Princesses Beware
What you will need:
- 2 pounds of ground venison
- 4 tablespoons of creole seasoning
- ½ a teaspoon of salt
- 1 teaspoon of garlic powder
- ½ a teaspoon of ground habanero or cayenne pepper
- ¾ of a teaspoon cardamom powder
- ½ a teaspoon marjoram
- 20 shakes of hot sauce
- 10 shakes of Worcestershire sauce
- 5 ounces of liquid smoke
- 1 tablespoon of coarse black pepper
How to make it:
- Combine ground meat with all ingredients except the liquid smoke and coarse ground pepper. You can use an electric mixer if desired.
- Place the meat between two sheets of wax paper and roll out with a rolling pin to desired thickness.
- Put the liquid smoke into a spray bottle.
- Take off the top piece of wax paper and spray the liquid smoke, then sprinkle the coarse black pepper all over the meat.
- Put a fresh piece of wax paper on top of the meat again, flip the meat over and repeat step 4 with this side.
- Place the meat into your oven, smoker or dehydrator and cook at 150 to 200 degrees Fahrenheit for 6-8 hours. If you place the meat in the oven, don’t forget to leave the oven door open slightly.
- Check on the meat after five hours and every half hour after that. When the meat is done, take it out and use a pizza cutter to cut into slices.
Teriyaki Deer Jerky
What you will need:
- 2 pounds of ground venison
- 2 tablespoons of salt
- 2 tablespoons of brown sugar
- 4 tablespoons of teriyaki sauce
- Pepper to taste (optional)
How to make it:
- Mix all ingredients into the ground meat thoroughly, using your hands. When thoroughly mixed, refrigerate overnight.
- The next day, load the chamber of the jerky gun with your ground venison mixture and squirt onto greased smoker trays.
- Smoke for 4 hours at 150 degrees Fahrenheit. Allow to cool completely before storing in your refrigerator or freezer.
Note: You can also substitute the venison with beef or buffalo for this recipe.
Sliced Deer Jerky Recipes
Smoke Flavor Venison Jerky
What you will need:
- 2 pounds of sliced venison
- ¼ of a cup soy sauce
- 1-2 tablespoons of Worcestershire sauce
- Your favorite cure (see package instructions)
- ½ of a teaspoon black pepper
- ½ of a teaspoon garlic powder
- ½ of a teaspoon onion powder
- ¼ of a teaspoon seasoned salt
- 2 tablespoons of brown sugar
- 2 tablespoons of liquid smoke
How to make it:
- Mix all of the ingredients together except for the meat, stirring until the sugar is dissolved.
- Slice the venison and add it to the marinade, then refrigerate overnight.
- Let the venison drain before drying, ensuring no liquid is running from it when it comes time to put it in your oven.
- Place the slices on wire racks and space each slice about ¼ of an inch apart to promote air flow.
- Cook in the oven for 200 degrees Fahrenheit for 5-6 hours and turn the strips over halfway through cooking.
- Cool for a few hours before storing them in your refrigerator or freezer.
Pro-Style Venison Jerky
What you will need:
- 3 pounds of sliced venison
- 1 tablespoon of salt
- Your favorite cure (see package directions for details)
- 1 teaspoon of onion powder
- 1 teaspoon of garlic powder
- 1 teaspoon of ground black pepper
- ¼ of a cup soy sauce
- 1/3 of a cup Worcestershire sauce
- 1 teaspoon of liquid smoke (optional)
How to make it:
- Freeze your venison for at least an hour before slicing it up. This will help keep the pieces roughly the same thickness when you slice them.
- Mix all spices together in a large bowl.
- Coat each slice individually by dipping each side into the marinade, ensuring all surfaces have been covered. After coating, place each slice into a large sandwich bag. A sandwich bag with a zip top works best.
- Pour any excess marinade over the meat in the sandwich bag, then close the bag. Refrigerate the meat for at least 24 hours.
- During the marinating process, mix up the meat and marinade a couple of times. This is so all of the meat absorbs the marinade equally, ensuring each piece is equally flavorful.
- Place on racks and into your oven, smoker or dehydrator, cooking at 150 degrees Fahrenheit at least. If you cook your jerky in the oven, leave it open slightly to allow moisture to escape.
- Cooking should take at least 5 hours. Turn the strips halfway through the cooking process, then continue cooking until strips are dry and dark brown.
- Allow to cool completely before storing in your refrigerator or freezer.
The Best Venison Jerky
What you will need:
- Fresh venison meat
- Salt
- Water
- Your favorite cure (follow package directions for details)
- A dry spice mixture or a blend of your favorite spices
How to make it:
- With a sharp knife, cut your venison to pieces about the size of your index finger. Ideally, you should keep the pieces under half an inch in thickness.
- Soak the venison in saltwater for 24 hours to draw out the blood. This also keeps the jerky tender when it’s cooked.
- Mix your cure and dry spice mix, then remove the venison from the saltwater. Place the venison in a zip top freezer bag and mix in your cure and spice mixture from earlier. Coat the meat in your spice and cure mixture, then refrigerate for at least 24 hours.
- After 24 hours have passed, preheat your oven to 200 degrees. Place the deer meat on either a pizza pan with holes in the bottom or on a wire rack over a cookie sheet. This is to allow air flow under the pieces.
- Cook the jerky for five hours, flipping each piece after two and a half hours.
- Allow to cool completely before freezing or refrigerating.
Note: If your jerky turns out softer than you expect, that’s fine. This deer jerky is supposed to be larger and softer than most traditional jerky recipes. This gives it wonderful versatility, making for excellent sandwiches, stew meat and, of course, eating it as it is.
The Know-It-All’s Deer Jerky
What you will need:
- 2 pounds of deer meat cut into ¼ inch thick strips
- 1 teaspoon of onion powder
- 1 teaspoon of black pepper
- ¼ of a cup soy sauce
- 1 tablespoon of garlic powder or ½ of a cup diced raw garlic
- 1/3 of a cup Worcestershire sauce
- Liquid smoke to taste
How to make it:
- Mix together all of the ingredients in a large bowl, except the meat.
- Place the meat into the marinade, seal and refrigerate overnight. Zipper bags also work well.
- Remove the venison from the refrigerator the next day and drain well.
- Preheat your oven to 200 degrees Fahrenheit.
- Next, either place the venison strips directly onto the oven racks with a pan beneath it to catch splatters, or place the strips on a wire rack placed on a greased cookie sheet. If your oven has an upper rack, you can also pierce each piece with a toothpick and hang it from that rack.
- Place the meat in the oven and cook for 4-6 hours. If the jerky is on a cookie sheet, make sure to turn the jerky halfway through the cooking time to help it dry evenly. Also be sure to keep the oven door open slightly to allow moisture to escape.
- When the jerky is dry, it’s done. Remove from the oven and let it cool completely before refrigerating or freezing. The jerky will last about a month or two in the refrigerator.
Note: If you want to offer condiments, some steak seasoning, Worcestershire sauce or simple salt make great additions.
The “No Frills” Deer Jerky Recipe
What you will need:
- 3-4 pounds of deer meat
- Your favorite cure (see package directions)
- 1 cup of soy sauce
- 1 cup of Worcestershire sauce
- 1 tablespoon of garlic powder
- 1 tablespoon of coarse black pepper
- ¼ of a cup liquid smoke
- 3 tablespoons of meat tenderizer
How to make it:
- Mix all ingredients except for meat.
- Cut deer meat into strips and soak in the marinade for 24 hours, stirring every once in a while.
- The next day, pierce each piece of meat with a toothpick and hang from the highest rack in your oven. Place a pan on the rack beneath it to catch any drippings. Don’t let the pieces of meat touch one another.
- Turn the oven on to 150 degrees and leave the oven door open slightly so moisture can escape.
- Allow at least 4 hours to cook. Allow to cool completely before storing.
Apple Cider Vinegar Jerky
What you will need:
- 1 ½ to 2 pounds of lean venison, cut into strips
- ¼ of a cup apple cider vinegar
- ¼ of a cup Worcestershire sauce
- 2 tablespoons of packed light brown sugar
- 1 teaspoon of kosher salt or smoked salt
- 1 teaspoon of garlic powder
- ½ a teaspoon of ground black pepper
- 1 teaspoon of dried mushroom powder
How to make it:
- Place all ingredients into a zipper bag and refrigerate it for at least eight hours.
- Place the meat on dehydrator trays and cook at 150 degrees until dried, at least 5 hours.
- Allow to cool completely before storing in your refrigerator or freezer.
Note: You can make your own mushroom powder if you do not have any at home. Slice up some mushrooms and place them in a dehydrator. Set the dehydrator to 145 degrees Fahrenheit and cook them until they are very dry and brittle. Then, put the dried mushrooms into a coffee grinder, blender or food processor and grind them to powder. You can do this with many other vegetables as well. If you do this with red bell peppers, you’ll be able to make your own paprika at home.
Conclusion
As you can see, there are plenty of creative ways to make delicious deer jerky. On the off chance you honestly don’t like our recipes listed above, you can always get creative and make up your own jerky recipes, as long as you keep the basics in mind. The best part about deer jerky is that it not only tastes great, but it also lasts for a long time whether you refrigerate it or freeze it, making it perfect for any leftover deer meat you happen to have laying around. The only bad thing about venison jerky is that venison contracts some pretty bad bacteria, making it vital to cook it at 150 degrees Fahrenheit at the minimum. Some people go as far as briefly steaming or precooking their venison before making it into jerky. With our professional tips and delicious recipes, perfectly good venison doesn’t have to go bad ever again.

How to Cook Venison (Plus Ten Recipes)
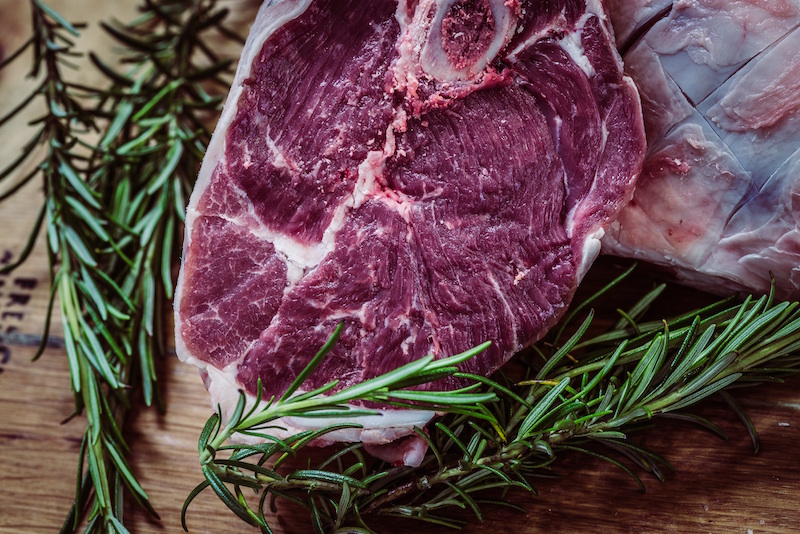
The secret to venison is in its preparation. This is because even farm-raised venison tends to be considerably drier and gamier than beef or lamb. Some people describe the taste of venison as mutton with a hint of beefiness.
Contents
What Is Venison?
 Venison is the meat of any type of deer. It does not just come from the white tail deer that are seen so often strapped to the tops of pick-up trucks or SUVs in the fall. Venison can also come from mule deer, red deer, reindeer, caribou, elk and even moose. Even antelope meat is considered venison. It matters not if the deer was wild, semi-tame like those deer found in those deer parks that belong to Great British country homes or raised as livestock like sheep. Venison used to be a bit challenging to obtain unless one had shot one’s own deer or bought meat from a hunter. However, nowadays venison can be found in specialty meat stores or can be ordered online.
Though venison ordered online can be pricey, if a person goes hunting and bags their own deer, the cost can be much less, pound for pound, than beef.
After the Hunt
After bringing down a deer, many people rush the processing, or outsource it by bringing the animal to a butcher. This is often a mistake, and results in a lower quality of venison. Meat is very easily tainted if an animal is not processed quickly, and most butchers combine animals when making meats like burger and sausage, so you can easily end up with tainted meat even if you do gut the animal properly.
According to some connoisseurs, buck meat is actually better tasting than that of a doe, and the meat of an older deer tastes better than that of a young one. This is because the meat of a too-young deer hasn’t developed the characteristic texture and taste that people prize in venison. On the other hand, some people believe that the meat of an old buck who has been harvested during the rut has a strange taste and is a bit too tough. Deer that are killed quickly and cleanly also seem to have meat that is sweeter and more tender.
A deer that’s been brought down is best field dressed right away, but this can be postponed for a couple of hours. The cooler the weather, the longer the field dressing can be postponed. It is best to remove the animal’s innards as soon as practicable. This prevents the meat from being unacceptably gamy and allows the carcass to cool down rapidly.
The animal’s throat really does not need to be cut to bleed it if it’s been field dressed, but some professionals suggest hanging the carcass upside down from a tree or letting it drain out on a slant if there are no trees in the area or the trees aren’t strong enough to support the carcass. Eviscerating a deer requires fairly large, sturdy and very sharp knives and steel chain mail gloves. A small knife can twist in the hand when it hits a bone.
Most people start butchering the deer around the shoulders, with the knife parallel to the animal’s ribs. Then, the back straps are prepared, followed by the neck. The ribcage meat is then butchered, and a saw is used to remove the backbone. The sirloin is removed, then the hindquarters are removed and boned. The shoulders are also boned, and the rest of the cuts are trimmed.
The deer also does not need to be skinned right away, but can be skinned after the carcass has been cooled down. This should be done ideally after the deer is field-dressed because the cut to the animal’s belly that allowed it to be eviscerated can be joined to the skinning cuts and the hide can be pulled off in one piece. Most people find it is easiest to hang a deer upside down and make the first cuts around the bends of the legs. It is absolutely essential to have a sharp knife. A bone saw is used to remove the deer’s head. If it’s a buck, the hunter tends to want to keep this.
Though venison can be eaten fresh, many people appreciate a bit of gaminess. People who have collected their own deer from the wild can encourage this gaminess by dressing the animal and allowing it to hang head down in an airy place with a temperature a few degrees above freezing for about 12 to 21 days. Ideally, aging should be done during the cooler weather. In many places, fall and early winter make up the deer hunting season, and this is the best time for aging the deer in this manner. Make sure that no flies or other vermin have access to the carcass, and make sure the meat does not freeze, for freezing will inhibit aging and subject the meat to faster spoilage when it thaws out.
The air that circulates around the meat will dry it out, and this dry layer should be trimmed along with cartilage, fat and everything that is not muscle after the meat is aged. A good, sharp boning knife can do this. The carcass should be placed on a sturdy, flat surface, and the muscle should be cut against the grain into slices or chunks.
After the meat is cut it should be put in the freezer right away unless it is going to be cooked. It should first be placed into plastic bags, and the air should be squeezed out of them before they’re sealed. If the meat is to be in the freezer for more than a few days, it should be further placed in freezer paper, taped shut and dated. Done this way, the venison should be good for up to a year in the freezer.
Other people wrap the meat in plastic wrap, then wrap it in butcher paper, seal it with tape, and then date it.
Venison Cuts
Venison cuts are much like the cuts of sheep or lamb. The carcass is divided into the neck, which provides trimmings; the shoulder, which provides stew meat and chuck roast; the rack end saddle, which provides boneless loin and chops, and the leg, which provides meat for stir frying, trim and boneless fillets. There’s the shank, or lower leg, which provides osso buco. The foreleg also provides osso buco. The loin end saddle gives boneless loin, tenderloin, sirloin and noisettes while the ribs provide trim and spareribs. A noisette is simply a round, smallish piece of lean meat.
As with sheep and cattle, different cuts of meat need different cooking times depending on how hard the muscles needed to work while the animal was alive. Generally, the meat found in the front part of the animal needs to be cooked slowly, while the meat from the middle and back can be cooked quickly. The exception is the meat from the shank, whose muscles had to do some work since it was part of the hind leg.
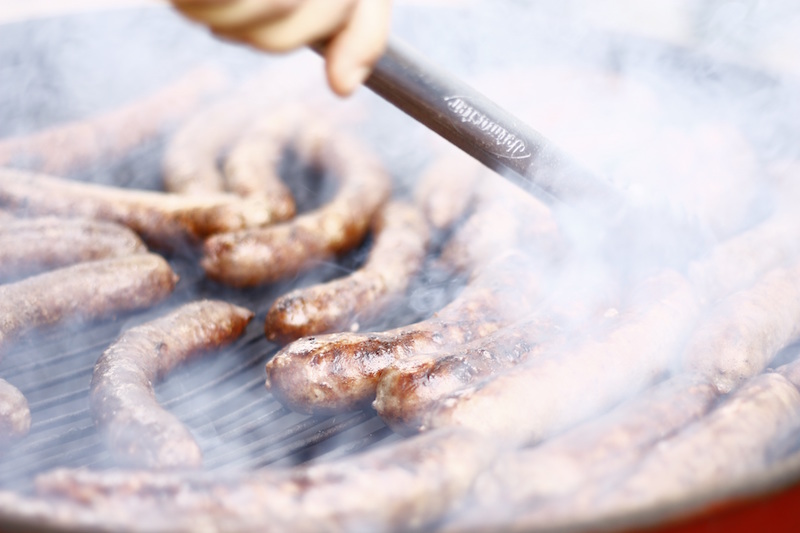
Though most people do not eat parts of the head, smoked tongue is eaten as a delicacy in Scandinavia. Venison is also used to make patés and sausages. Venison can also be ground to make patties and meatloaf. People also eat venison heart, liver and kidneys.
Venison is also served as jerky. This means it is sliced into strips, salted and dried. When jerky is ready it can be eaten right away and does not need to be refrigerated.
How To Buy
When buying venison, the flesh should be dark red and close grained. The fat should be bright and clear, but it should be trimmed off before cooking because it isn’t very appetizing. Instead, replace the fat with bacon, pancetta, prosciutto or other pork before cooking. Another thing to do before cooking is to put the venison in a marinade to make it more tender. This marinade can be made of oil, vinegar, spices and red wine. Traditionally, juniper berries are also added. Some cooks just soak the venison in a very good olive oil.
Prepping
 When it’s time to cook the venison, remove it from the marinade and wipe dry. Wrap it in pork fat or lard it with thick strips of bacon or fatback. Larding is the process of inserting pieces of fat into venison or other lean meat. Some people use fatback or a very fatty bacon to lard. There are still people who soak the bacon in vermouth or cognac first. Then, they cut it into inch long triangles and freeze it, then cut slits in the venison and insert the frozen triangles. It’s important that the triangles be inserted all the way into the meat, which is why the bacon or fatback needs to be frozen hard. They should be inserted every inch or two inches in the piece of venison.
On the other hand, some people simply lay strips of fatback or bacon all over the cut of venison, and then wrap it in a piece of parchment paper that’s been oiled. Then, they secure it with string. Folks who don’t want to bother with this wrap the venison in aluminum foil. Spices that work well with venison include juniper berries, rosemary and warm, tropical spices such as cinnamon, nutmeg, mace and allspice.
Offal is also eaten. These are just the internal organs of the deer. The heart has a taste that reminds some people of the sirloin. It needs to be cleaned of its connective tissue and fat first. Cut off the top of the heart, then trim off the outer membrane without slicing deeply into the muscle. Then, butterfly the heart and trim the connective tissue out of the chambers. This is best done with a small, very sharp knife like a paring knife.
The kidney also needs to be cleaned fairly thoroughly before it is eaten. All fat, connective tissue and membrane need to be removed from the outside of the kidney with a sharp knife. Then, the kidney needs to be cut in two and the white vein removed completely. The cook can use kitchen scissors to do this. Kidney can also be soaked overnight in milk to remove any hint of urine. Venison liver can also be soaked in milk overnight after it’s prepared.
Deer offal, by the way, is not strictly called venison, but umbles, as in ‘umble pie.
Cooking
 Some experts recommend that the meat of a buck be cooked for 25 minutes per pound while the meat of a doe should be cooked for 20 minutes per pound. Tender cuts should be cooked in a hot oven, while tougher cuts can be cooked in a slow oven of about 300 degrees Fahrenheit. The meat is done when the juices run clear when it’s pierced with a knife. There should be no sign of blood. Rare to medium rare venison should have an internal temperature of 130 to 140 degrees F when tested by an instant read thermometer.
The cook should be careful to not undercook venison, especially if it is from a wild animal. Undercooked meat brings a risk of disease. Of course, overcooked venison is tough and chewy.
Venison cuts are also versatile and can be cooked in a variety of ways. According to some experts, boneless loin can be broiled, sautéed or barbecued over direct heat. It can also be roasted.
Tenderloin can also be broiled, sautéed, direct barbecued and roasted, as can sirloin and boneless leg fillets. Noisettes are best broiled, sautéed, direct barbecued but not roasted. Kabobs can be direct barbecued or broiled, as can hamburger patties. Trim can be sautéed or stir fried, while cutlets can be broiled or sautéed and fried.
Chop ready rack of venison is best sautéed or roasted, while stew chunks should be braised. The best way to do this is to brown the meat in a Dutch oven or heavy bottomed pot, then remove the meat and cook the onions, garlic and other aromatics till golden, then add the herbs. When herbs have wilted, return the meat to the pot and add enough liquid to cover. Bring to a simmer, and then place the pot in a cool oven of about 200 degrees. Simmer from four to 12 hours or until the meat falls off the bone. When this is done, take the meat from the pot and reduce the sauce.
Chuck or shoulder roast are best roasted, braised or placed over indirect heat on the barbecue. This is also true of ribs. Osso buco or shanks should also be braised, while ground venison that is to go into pasta sauces should be broiled or sautéed. Sausages can be broiled, sautéed, placed over direct heat on a barbecue or steamed.
Recipes
Here are some of our favorite venison recipes:
- Venison Spanish Rice
- Venison Mushroom Hash
- Crockpot BBQ Pulled and Smoky Venison
- Vegetable Venison Stew
- Venison Meatloaf
- Mexican Venison Lasagna
- Venison and Noodles
- Italian Inspired Venison Casserole
- Crockpot Shredded Venison Pot Roast
- Cheesy Mexican Inspired Venison Stuffed Peppers
Accompaniments
Venison is best served with a strong condiments such as cranberry sauce, currant jelly or spiced cherries. Cumberland sauce goes especially well with venison. This is a fruit sauce that is often used with game. It’s made up of the juice and zest of orange and lemon, ruby port, red current jelly and a pinch of cayenne and cinnamon. As the ingredients suggest, this sauce is sweet, hot and spicy all at once.
Other side dishes that go well with venison are wild rice, dumplings, noodles and mashed potatoes. These last three are especially popular with venison in the northern European countries of Germany and Scandinavia. Red cabbage is also traditionally served with venison in these parts of Europe.
Nutrition
Pound for pound, venison has less fat and cholesterol than beef. A 93 gram patty of ground venison has 174 calories. Sixty-nine of those calories are from fat, and the total fat content is 8 grams. Four of those grams are saturated fat, and there is no trans fat. There are 1.8 g of monounsaturated fat and .04 g of polyunsaturated fat. A venison patty has 91 milligrams of cholesterol and 73 mg of sodium. It has no carbohydrates, dietary fiber or sugar, but has 25 g of protein.
A venison hamburger has no vitamin A or C but provides 1 percent of the daily value of calcium and 17 percent daily value of iron. It has 0.6 mg of vitamin E as alpha tocopherol and 1.3 micrograms of vitamin K. Venison is exceptionally rich in the B vitamins, which do much to support the health of the nervous system and other systems in the body. A patty has 0.5 mg of thiamin, 0.3 mg of riboflavin, 8.6 mg of niacin, 0.4 mg of vitamin B6, 7.4 mcg of folate, 2.2 mcg of vitamin B12, 0.7 mg of pantothenic acid, an impressive 94.8 mg of choline and 12.5 mg of betaine.
Venison is also surprisingly rich in omega-3 fatty acids, which help to lower the “bad” cholesterol and contribute to good cardiovascular health. A venison patty has 87.4 mg of omega-3 fatty acids and 247 mg of omega-6 fatty acids.
Venison also contains necessary minerals for good health. A 93 g patty has 13.0 mg of calcium, 3.1 mg or iron, 22.3 mg of magnesium, 212 mg of phosphorus, 339 mg of potassium, 72.5 mg of sodium, 4.8 mg of zinc. It also has 01. mg of copper, and 9.6 mcg of selenium. The meat has no alcohol, caffeine or theobromine, but has 59.7 g of water and 1.0 g of ash.
Wild-caught or bought pre-packaged, venison is not only delicious when prepared and cooked properly, but is full of nutrition and surprisingly low in calories.
Venison Spanish Rice
This is a quick and easy, one-pot recipe that substitutes ground venison for ground beef. The tomatoes give it a Spanish take and depending on your preference of heat, you can spice it up a bit by adding your favorite hot peppers like chopped jalapenos or red chilies. You can also use brown rice instead of white, if you prefer a healthier blend of rice. The bacon adds a bit more flavor and leaving the grease in the pan helps cook the venison, which is lean and has no fat.
If you have any leftover rice, store in the refrigerator and heat up the next day, as it will absorb more of the flavors as it sits. This recipe works well with a side of cornbread.
Ingredients
- 1 lb. of ground venison
- 1 cup of onions chopped
- 1 cup of bell peppers chopped
- 6 bacon strips uncooked
- 2 10-oz. cans of diced tomatoes and chilies
- 1 tbs. garlic powder
- 1 tbs. onion powder
- Salt and black pepper to taste
- 2 tbs. chili powder
- 2 cups of rice uncooked
- 5 cups of water
- Nonstick cooking spray
Utensils
- Dutch oven or large soup pot
Directions
- Spray a Dutch oven or large soup pot with nonstick cooking spray. Slice bacon into 1-inch pieces and fry in pot until done. Remove the cooked bacon pieces leaving the grease in pot.
- Add the ground venison into the pot with the bacon grease and cook until done and brown.
- Add water, diced tomatoes and chilies, chopped onions and bell peppers, garlic, onion and chili powders, rice and bacon pieces. Stir well to mix.
- Bring the mixture to a boil, cover with a lid and reduce heat to medium-low to simmer.
- After approximately 15-minutes, stir the venison rice mixture and taste. Add the desired amount of salt and pepper.
- Place the lid back onto the pot and continue simmering the rice mixture for another 15 to 20 minutes. It is done when the liquid is absorbed and the rice is tender.
Recipe makes approximately six servings.
Tip
If you have a leftover cooked venison roast, you can substitute it for the ground venison. Make sure to shred the meat or chop it into small pieces before adding it to the rice mixture. You can skip the step for cooking the meat, if you use venison that is already cooked.
Venison Mushroom Hash
This recipe puts a new spin on old-fashion hamburger hash by substituting ground venison for the ground beef and adding mushrooms. Venison hash is a pure comfort food recipe, which is a one-dish meal and is so easy to pull together and make. It works well as a brunch item or used for dinner and will have everyone in the family coming back for more. To round out the meal, pair it with a side salad, your favorite vegetable and bread.
Ingredients
- 1 lb. of ground venison
- 2 tbs. vegetable oil
- 2 tbs. butter
- 1 cup of onions chopped
- 1 cup of bell pepper chopped
- 2 tsp. black pepper
- 1 tbs. seasoning salt
- 1 lb. of mushrooms washed and sliced
- 1 tbs. garlic powder
- 1 tbs. onion powder
- 3 large potatoes cut into 1-inch cubes
- Nonstick cooking spray
Utensils
- Large skillet
- Large bowl
Directions
- Spray a large skillet with nonstick cooking spray and add vegetable oil.
- Brown the ground venison until thoroughly cooked. Once done, remove meat from the skillet and place in a large bowl, allowing any remaining oil to remain in the pan.
- Add butter to the skillet and melt. Add cubed potatoes, seasonings and fry until almost done. Add another tablespoon of vegetable oil while cooking if more is required.
- Before potatoes get completely soft and done, add bell pepper, onions and mushrooms and continue cooking over medium-heat until potatoes are done and vegetable are just soft.
- Add cooked venison into the potato mixture, stirring well and heating through.
Recipe makes four to six servings.
Tips
- Any type of mushrooms will work well in this recipe from portabella to button. If you don’t have fresh mushroom on hand, canned also work well just be sure to drain before using so you don’t add too much moisture to the hash.
- If you have leftover cooked venison roast on hand, you can also use that by either shredding it or chopping it into 1-inch cubes. If using cooked meat, you can skip the first step of cooking the meat and add it after the potatoes and vegetable are cooked.
Crockpot BBQ Pulled and Smoky Venison
Do not think you have to go to a barbecue joint to get the full-flavor of pulled meat and don’t think that pork is the only meat that you can cook this way. Venison is leaner than pork and makes a tasty barbecue when slowly cooked in a crockpot with all the spices added to give it that smoky taste. Slow-cooking the lean meat makes it so tender it easily pulls apart with a fork. Depending on how quick you want the venison to cook, you can place the roast whole into the crockpot and cook for approximately eight-hours or cut the meat into chunks to reduce cooking time. This recipe works well used as your typical barbecue on a sandwich bun or served plain. Pair with baked beans, potato salad, coleslaw, and if served without a bun, a loaf of garlic bread helps finish this tasty meal.
Ingredients
- 2 lb. venison roast (any cut will do)
- 1 tbs. garlic powder
- 1 tbs. onion powder
- 1 tbs. liquid smoke
- 2/3 cup of water
- 1 16 oz. bottle of barbecue sauce
Utensils
- Crockpot
- Crockpot liners (optional)
Directions
- Place crockpot liner into crockpot, if using one. The liner only makes cleanup easier.
- Place the whole venison roast into the crockpot, or cut into chunks to reduce cooking time.
- Add garlic powder, onion powder, liquid smoke, water and barbecue sauce into the crockpot with the roast.
- Put the lid on the crockpot and turn on low. Allow the roast to cook for approximately eight hours. If you want to speed up cooking time, for the last two hours turn the crockpot on high.
- Test for tenderness of the roast by using a fork to shred the meat. If it pulls easily apart, it’s done. Mix the shredded venison well into the other ingredients.
- Recipe makes six to eight servings
Depending on your preferred taste, any flavored barbecue sauce works well. If you prefer a hotter barbecue, use a hot barbecue sauce or add 1 teaspoon of cayenne pepper to the crockpot while the venison is cooking.
Vegetable Venison Stew
This is a standard recipe of vegetable beef stew only you are substituting the beef for leaner venison, ending up with a tasty bowl of hearty goodness. Since venison is leaner than beef and can have a tendency to be tough due to the lack of fat, the trick is to cut it into smaller pieces and simmer until fork tender before adding all the vegetables. Adding all the vegetables too soon and while the venison is simmering to become tender can have them end up being mushy. Once done, serve up a bowl of stew with some hot buttery rolls or garlic bread.
Ingredients
- 2 lbs. venison roast or steak cut into 1-inch cubes
- 2 tbs. vegetable oil
- 10 cups of water
- 1 pkg. onion soup mix
- 2 pkgs. of Au Jus mix
- 1 cup of chopped onions
- 1 cup of chopped celery
- 1 tbs. garlic powder
- 1 tbs. onion powder
- Salt and black pepper to taste
- 2 bags of frozen mixed vegetables
- 2 large potatoes cut into 1-inch cubes
- Nonstick cooking spray
Utensils
- Dutch oven or large soup pot
Instructions
- Spray soup pot or Dutch oven with nonstick cooking spray and add vegetable oil. Turn to medium-high heat.
- Add venison cubes and braze until brown. Reduce heat to medium.
- Add water, onion soup mix, au jus mix, chopped onions, chopped celery, garlic and onion powders.
- Raise heat to bring to a boil and then reduce to medium-low to simmer. Simmer meat for approximately one to two hours until the meat is fork tender. Taste and add desired amount of salt and pepper.
- Add frozen mixed vegetables and chopped potatoes and simmer for an additional one to 1.5-hours. The potatoes will be soft when done.
Recipe makes eight servings.
You can substitute fresh vegetables for the frozen ones. If you don’t care for all the vegetable types contained in mixed vegetable or like something else, you can use something like carrots, peas or corn, etc. You can also substitute one bag of frozen chopped onions and celery in place of fresh.
Venison Meatloaf
This is one of the many basic meatloaf recipes, but this one uses ground venison in the place of ground beef and with a spaghetti sauce base. The recipe is easy to pull together and does not make a mess because you mix in one bowl and best of all — it is tasty. Pair the meatloaf with mash potatoes and brown gravy, along with your favorite vegetable and hot rolls. It makes a fulfilling comfort food meal summer or winter.
Since venison is naturally lean, which can lead to dryness, the eggs, spaghetti sauce and uncooked bacon strips add moisture and a little fat, making the meatloaf moist. If the meatloaf seems like it needs a little more moisture when you are mixing things together, add a bit more spaghetti sauce until the loaf achieves the desired consistency. When it comes to the mustard topping, any type you prefer will work well.
Ingredients
- 1 lb. ground venison
- 2 cups Italian-flavored breadcrumbs
- 2 eggs (beaten)
- 1 cup spaghetti sauce
- 1 tsp. salt
- 1 tsp. black pepper
- 1 tbs. garlic powder
- 1 tbs. Italian seasoning
- 1 medium onion finely chopped
- 1/2 cup bell pepper finely chopped
- Mustard
- 4 to 6 slices of uncooked bacon
- Nonstick cooking spray
Utensils
- Loaf-sized baking pan
- Mixing bowl
Instructions
- Place ground venison, breadcrumbs, beaten eggs, spaghetti sauce, spices, chopped onion and chopped bell peppers into a mixing bowl.
- Mix the ingredients together well.
- Spray a loaf-sized baking pan with nonstick cooking spray.
- Form the meatloaf mixture so it fits into the baking dish.
- Spread enough mustard on top of the meatloaf to cover the top.
- Lay the pieces of uncooked bacon next to each other covering the top of the meatloaf.
- Cook the meatloaf in a preheated 350-degree oven for approximately one hour. Test for doneness by inserting a knife into the center of the meatloaf and if it pulls out clean, the meatloaf is done.
Recipe serves six
Tips
- You can mix the meatloaf’s ingredients using a large spoon, but you might find it easier to mix everything together by using your hands.
- Use leftover meatloaf by quickly browning each side in a skillet sprayed with nonstick cooking spray and 1 to 2 tablespoons of butter. Once browned, lower the heat to low and lay a slice of your favorite cheese on top to melt and then enjoy.
Mexican Venison Lasagna
This quick and easy recipe is a Mexican take on lasagna, with corn tortillas a substitute for the pasta and the venison replacing ground beef. You still end up with a layered dish like traditional lasagna, only this is filled with the full-flavor of the spiced venison, refried beans and cheese layered between the corn tortillas.
If you prefer a spicier blend, use hot taco seasoning or add 1 teaspoon of cayenne pepper to the meat while it’s cooking. You can also add your favorite hot peppers to the cooking meat, which also gives it more of a bite. The recipe also works fine if you want to substitute flour tortillas for the corn tortillas. When done, top with shredded lettuce, tomatoes, sour cream and taco sauce.
Ingredients
- 2 lbs. ground venison
- 2 tbs. vegetable oil
- 2 pkg. taco seasoning
- 1 10 oz. can of diced tomatoes & green chilies
- 2 cups of water
- 1 10 oz. can of enchilada sauce
- 2 15.5-oz. cans of refried beans
- 2 16-oz packages of shredded Mexican cheese
- 18 corn tortillas
- Nonstick cooking spray
Utensils
- Large skillet
- 9 x 13 baking dish
Directions
- Spray a large skillet with nonstick cooking spray. Add the vegetable oil and ground venison. Brown the venison until done.
- Add the taco seasoning, tomatoes and chilies, and water to the cooked venison. Stir to mix and bring to a boil and then reduce the heat to medium-low. Simmer uncovered to reduce the fluids and then remove from the heat to cool.
- Spray a 9 x 13 baking dish with nonstick cooking spray.
- Spread half the enchilada sauce evenly over the bottom of the dish,
- Spread six of the corn tortillas evenly over the enchilada sauce (they will slightly overlap).
- Add half the meat mixture over the layer of corn tortillas and spread evenly.
- Add another layer of six corn tortillas spread evenly over the meat.
- Spread the refried beans evenly over the layer of corn tortillas. Sprinkle one bag of the shredded cheese over the refried beans.
- Add one more layer of six corn tortillas over the beans and cheese.
- Spread the remainder of the meat over the last layer of corn tortillas and sprinkle the remaining cheese evenly over top.
- Bake uncovered for approximately 45 minutes or until the center is heated through in a preheated 350-degree oven.
This recipe makes six to eight servings.
Venison and Noodles
This is an easy take on the standard beef tips and noodles recipe substituting the beef with venison. Since venison is leaner than beef but the recipe calls for the meat to simmer until tender, any cut of venison roast or steaks will do. If you desire more vegetables added into the mix, throw in two cups of green peas or carrots when the venison is cooking for its last half-hour. You can overcook the vegetable if you add them too soon.
The end-result is a comfort food dish that is simple to make, does not take many ingredients or have you spending hours in the kitchen pulling things together. The entire family will enjoy this tasty meal, which pairs well with a tossed salad and bread.
Ingredients:
- 1.5 to 2 pound venison roast or steak chopped into 1-inch cubes
- 3 tbs. of vegetable oil
- 1 tbs. garlic powder
- 1 tbs. onion powder
- 1 cup of chopped onions
- 2 cups of chopped celery
- Salt and black pepper to taste
- 2 pkg. of au jus mix
- 6 cups of water
- 2-3 tbs. of cornstarch
- 1/3 cup of water
- 1 12oz. pkg. of egg noodles cooked
Utensils:
- Dutch oven or large pot
- Large pot for noodles
- Strainer
- Small cup
Directions:
- Spray Dutch oven or large pot with nonstick cooking spray, add vegetable oil and turn heat on medium high.
- Add chopped venison, garlic powder and onion powder and braze until meat is brown on all sides.
- Stir in two packages of au jus mix, chopped onions, chopped celery and 6-cups of water and stir well.
- Bring mixture to a boil and then reduce heat to simmer and cover the pot. Allow the meat to simmer for approximately 1.5 to two hours until the meat is fork tender.
- Add salt and pepper to desired taste.
- Mix cornstarch and remaining water into a small cup to make a roux to thicken the meat mixture. Pour slowly into the meat mixture stirring well until desired thickness is achieved.
- Bring a large pot of water to a rolling boil and add egg noodles, stirring occasionally to keep from sticking. Cook for approximately 10-minutes or until done.
- Remove noodles from pot and strain to remove excess water.
- Place warm noodles on a plate and cover with venison meat mixture.
This recipe makes four to six servings.
Italian Inspired Venison Casserole
This Italian inspired casserole gives a new twist by substituting lower fat ground venison for ground beef and makes a tasty and hearty one-dish meal. This dish pairs well with a tossed salad and loaf of garlic bread, to round out the meal.
Depending on your personal taste, any type of spaghetti sauce works well, so if you desire a cheesier taste, use a cheese-based sauce and if you like more spices, use a sauce with a basil and garlic base. You can also substitute 6-Italian shredded cheese for mozzarella.
Whatever sauce or cheese you decide to use, this recipe is bound to have everyone leaving the table full and satisfied.
Ingredients:
- 1-lb. ground venison
- 2 tbs. vegetable oil
- 1.5 tbs. Italian seasoning
- 3 cloves chopped garlic
- 2 tsp. salt
- 1 tsp. black pepper
- 2-9.6 oz. cans of mushrooms
- 1-cup Parmesan cheese
- 1-16 oz. bag of Mozzarella cheese
- 1-1-lb. box of Ziti pasta
- 2-24 oz. jars of spaghetti sauce
- Nonstick cooking spray
Utensils:
- Large skillet
- Large cooking pot
- Strainer
- 9 x 13 casserole pan
Steps:
- Spray a large skillet with nonstick cooking spray, add 2 tablespoons of vegetable oil and brown the venison over medium heat, cooking until done.
- Add chopped garlic, 1 tsp. salt, black pepper, mushrooms, Parmesan cheese and one cup of the spaghetti sauce into browned venison and mix together, continuing to cook on medium-low heat for another five minute. Remove from heat.
- Fill a large cooking pot half-full of water and the remaining salt and bring to a rolling boil.
- Add the pasta and cook for approximately 10 minutes until just done, stirring occasionally to keep from sticking. Once done, drain the pasta in strainer to remove the excess water.
- Spray casserole pan with nonstick cooking spray. Pour pasta into casserole pan, add browned venison mixture, remaining spaghetti sauce and mix well.
- Sprinkle mozzarella cheese over the top of the pasta and place in a preheated 350-degree oven and cook for approximately 30 to 45 minutes until the cheese is melted and the center is heated through.
Makes six servings
Tip: You can also mix all the ingredients in a large mixing bowl before placing into the casserole dish, if it makes mixing easier for you.