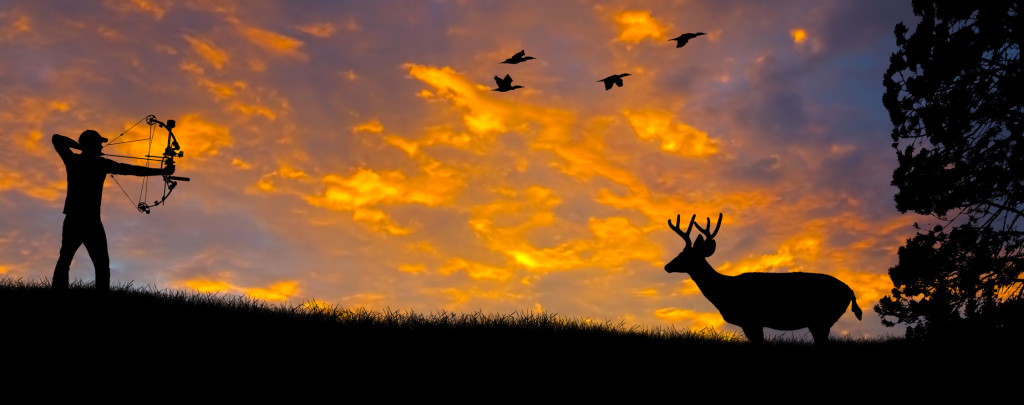
A Way of Life in the USA
Hunting is a way of life in the United States, and we are here to help you be as successful on the hunt as possible.
How to Hunt Deer in 2017
 Deer hunting is a time honored tradition in American culture. It is a way to feed your family higher quality protein than you could ever find in a store. It is a thrilling adventure and sport, filled with adrenaline rushes and brutally long hikes carrying heavy packs. It is a way to connect with nature, and our more primal side. It’s easy to see why so many individuals in the US go out each year in pursuit of a trophy buck or a full freezer (or, more likely, both).
Many people these days aren’t raised as hunters. This guide is a great starting point for anyone that is interested in learning how to hunt deer. It will go over everything from equipment, to spotting, to legalities and even what to do after a successful hunt. Whether you are a novice or a seasoned hunter, there is something here for you. It is long and in depth, so use the table of contents to jump around easily to the topics that you most want to learn about.
Good luck, and we’ll see you in the field!
Preparation
Preparation is without a doubt the most important aspect of becoming a successful deer hunter. If you aren’t fully prepared for any circumstances that could pop up, you’ll find yourself in big trouble if the worst happens. What if you are stuck out in the cold without survival gear? What if you forgot your deer tag and get caught by the authorities? Or what if you don’t have the right weapon and you can’t make a clean kill? There are way too many potential circumstances to list, so I won’t get into them all. Moral of the story is, be prepared for anything when deer hunting.
This section covers some of the biggest things you need to do to get prepared. Read over it carefully, and make sure that you have thought of all the things you may need for your specific circumstances. If you’re going to be using an ATV, do you have extra gas for it? If you are hiking through snow, do you have waterproof boots that won’t slip when you walk? There are an infinite amount of possibilities, so make sure you’re prepared for all of them properly.
Getting Legal
The absolute number one thing you need to do before anything else when getting ready for the upcoming deer hunting season is making sure you are totally legal. If you don’t, you could end up in jail for poaching. So get your valid hunting license first. In some cases with most states, you’ll have to take a class before getting the license.
Once you get your license, you may need to get a tag. Again, this varies by state, but it is extremely important that you get one that is for the species of deer you want, the sex of deer you intend to hunt, and for the right area. You may have to put in for a lottery in order to draw the right to buy a tag. In my home state of Idaho, for instance, there are certain areas where you can buy a “general” tag that allows you to hunt for one male deer. However, there are certain areas, which are typically much more desirable to hunt in, where you have to put in and win a lottery to be able to hunt there.
If you want to find out more details about the legal aspects of hunting deer in your state, first check out the homepage of we have articles here covering every state.
From there, check out your state’s government’s website, they will have an entire section (and sometimes a separate website) dedicated to hunting laws.
Species Information
Knowing what you are hunting is one of the most important aspects of deer hunting. There are big differences between the species that you need to be aware of. Not only will it help to know the behaviors and habitat of the species you are hunting, but it will also keep you out of potential legal trouble. If you have a “whitetail only” tag and you shoot a mule deer, you could be faced with poaching charges.
Here are rundowns on four of the most common deer species to hunt in the lower 48 states:
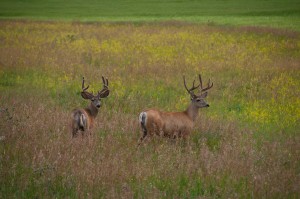
Whitetail Deer:
The whitetail is one of the most common deer to hunt in the United States. It has abundant populations in many different areas.
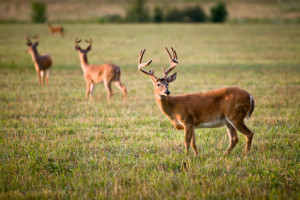 Distinctive in its appearance, the whitetail deer is the species from which all sub-species originate. Its coat changes with the seasons. During the early spring to late summer their coat is red/brown to deep red. This changes to a coal/gray color from early fall through the winter season. Just like its name, its one unique feature is the whitetail underside. The species raises this as a warning of danger.
Population locations depend primarily on their eating habits. Although they will eat mice and birds, this is rare. Whitetails are primarily herbivorous and feed on clover, mushrooms, grasses and hay. They will eat unprotected animal feed, gardens and agricultural growth as well as personal pet food. Their steady foraging will damage areas if the population is not controlled.
Understanding whitetail deer patterns means remembering they go where an abundance of food supply is available, they move to secure locations, and breeding factors. The seasonal movement of the whitetail deer species begins during the fall with the majority of the species conducting their movement at dusk and early morning. The male (buck) lays low during this time while the female (doe) locates a secure location. The feeding range, where food is available, usually consists of a one-mile radius.
The average size of this species varies depending on its sex and location. Male whitetails can weigh in between 100 lbs. to 350 lbs. Average weight is between 80 and 135 lbs. The female primarily is smaller and weighs in at an average of 125 lbs. The male’s antlers regrow annually with the growth period most predominant from spring through early winter. At this point, the male will then shed the antlers. Depending on the male’s access to an abundant feeding ground, the age of the deer, and time of year, they can potentially grow eight-point antler racks.
The Live Outdoors website lists whitetail deer rankings for the five optimal hunting areas in the United States. It is important to state that these rankings change from year to year as the deer population changes from region to region. Colorado takes the number one spot with Iowa taking second place. Although it is not in the United States – Alberta, Canada is third, followed by Arizona fourth and Texas taking fifth.
There are over seventeen sub-species of the whitetail deer hunted in the United States. This whitetail deer information may slightly change depending on climate conditions. Out of the seventeen, the largest are the Northern Woodland, the Kansas, the Dakota, the Texas, the Northwest species, and the Avery Island whitetail. Average size sub-species include the South Carolina (Hilton Head and Hunting Island species), the Blackbeard Island, Florida whitetail, and Florida Coastal.
The smallest of the seventeen sub species are the Florida Key-deer with Bull’s Island being small and limited, as well as the Carmen Mountain, the Arizona and Columbian.
The most popular hunted species all other sub-species derive from is the Virginian whitetail deer. Its range covers over ten states and is considered a good size deer with large antler growth.
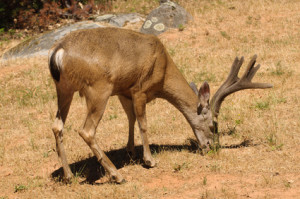
Mule Deer:
Mule deer are widely distributed throughout western North America. They can be found from north central Canada, west to southeast Alaska, all along the Pacific coast, down to Baja, and from Baja west to the Texas panhandle.
Mule deer are named for their large mule-like ears. Even though their ear canals are roughly the same size as that of humans, their ears can be nine inches in length. They can also swivel their ears 360 degrees to listen for predators. The mule deer can hear a much larger range of frequencies than humans can, making this one very nervous animal.
 Another feature that differentiates the mule deer from other deer species is that their tail set is downward, unlike the whitetail deer which holds its tail upright. Another characteristic of the mule deer is the bounding gait they exhibit, called stotting. When not walking, stotting or loping, a Mule deer is capable of running 40 mph for several miles before stopping, a good asset to possess when you consider mule deer are the number one prey of mountain lions. Mountain lions depend so heavily on the mule deer for food that the mountain lion’s jaw has evolved over time to fit the throat and windpipe of deer in order to hasten their kill.
The life span of the mule deer in the wild is about ten years. They are susceptible to a host of diseases and parasites such as Chronic Wasting Disease, Hoof and Mouth, plus many bacterial infections. Tough winters can also decimate herd populations in higher elevations. Normally, the first good snowfall will trigger the mule deer migration from the high mountains down to their winter range. Failure to move lower before heavy snow will leave them snowbound and starving.
Mule deer does can birth from one to four fawns in late spring. Both sexes tend to browse and band together as the snow and ice retreat. The deer head back to higher elevations prior to the onset of summer. The bucks’ antlers shed in winter and by spring are quickly growing back as food sources become more available. It is during this time that the antlers are referred to as being “in velvet” due to the soft membranes covering the boney growths.
By late summer, mule deer segregate according to gender. Younger bucks group together in bands called bastards, while the older, more experienced bucks go alone, waiting for the rut to begin.
Cooling weather appears to be the mechanism by which nature tells the mule deer it’s time again to breed. The bucks spar with brush and tree limbs, honing their fighting skills while marking their territories. The larger bucks become stirred by the sounds of rattling antlers and move in from their haunts to do battle for the right to breed.
Blacktail Deer:
Blacktail deer inhabit the western reaches of North America from British Columbia into California along the coast and some distance inland.
Dan Gibson, a blacktail deer information expert, says the deer can be found as much as 100 miles from the coast. While they may range further inland, they grow increasingly rare as the distance from the ocean increases.
 The most recent genetic studies show the blacktail deer is a subspecies of mule deer.
Most trophy-class blacktails are in the 140-pound range. While 200-pounders have been killed, they are very rare. Males are larger than the females when fully mature. Young deer can be the same size. Trophies are typically mature deer. Young animals have not had time to get full expression of their antlers. Blacktail bucks shed their antlers every year and grow a new set by fall. While also extremely rare, female blacktail can have antlers.
The blacktail deer is crepuscular, active in the twilight hours of early morning and late evening, but can be found foraging any at time of the day or night. They prefer the edge of open areas and thick woods as this is where their preferred food is commonly found.
The blacktail is a browser. It will feed briefly in one place and move on, unless it has a compelling reason to stay in one spot. They eat a wide variety of plants, preferring tender green plants if at all possible. The can eat Douglas fir, Organ yew and western cedar if necessary. Food plots of native vegetation and domesticated peas, beans and grasses will attract these animals. Baiting these deer can cause them to concentrate in one area and stay at a feeding station for a while.
The deer feed heavily in spring and summer to build up fat reserves for the winter. Starvation is a major cause of death among these animals.
During the rut, breeding season, big males will be active almost constantly, giving little time to feeding and sleeping. The bucks are much less wary during the rut and most trophy-class animals are killed at this time. Bucks will lose weight during the breeding period. The rut is at a maximum in November.
Hunting regulations vary by state and province. In parts of California a bow-only season opens in July. In other
places, the hunt does not begin until September or October. Hunting regulations also vary as to what antler-size and gender animals can be killed.
Successful hunters will find movement patterns for the deer in an area. They will learn where the deer feed and where they bed down. Putting a hunting stand between these two locations allows a hunter to kill a blacktail on the way to bed down in the morning or on the way to feed in the evening. In both cases, the hunter should be in the stand well before he expects to see deer.
Hunting pressure will turn these animals completely nocturnal, even during the rut.
California produces the most record book bucks, but the very biggest come from the northern reaches of the blacktail’s territory.
Coues Deer:
Named after Dr. Elliot Couse, the naturalist and ornithologist who discovered them, Couse deer are a diminutive subspecies of whitetail deer. Nicknamed the “grey ghost” for their seemingly supernatural ability to appear and vanish like smoke, the elusive little deer is one of the most challenging species of all North American big game animals.
Volumes have been written about Coues deer; however, much of the available Coues whitetail deer information is incomplete or inaccurate. Commonly mispronounced either “cows” or “coos,” Couse is properly spoken “kouse,” as in replacing the “h” in house with a “k.”
Couse deer have one of the most restricted ranges of all species of whitetail deer. Inhabiting the mountainous regions of the desert southwest of the United States and the mountains of northern Mexico, Couse deer are not found in low-lying valleys like their larger cousins of the northern United States. Living at elevations from 3,000 to 10,000 feet, Couse deer primarily inhabit southwest New Mexico, south and central Arizona, California along the Arizona border and almost all of Sonora, Mexico.
Coues deer do not migrate and have a limited individual home range of less than 1,000 acres. During the morning hours Couse whitetails are found feeding on southern hillsides and then bedded during the day, under trees or in tall grass on north facing hillsides in the summer months and southern facing slopes during the winter.
Aside from their smaller physical size, Coues whitetails are no different from their larger relatives. Larger only than the key whitetail deer found in the Florida Keys, Coues whitetails stand between 24 and 32 inches high at the shoulder. Male deer weigh an average of 125 pounds with the does averaging approximately 80 pounds.
Coues whitetail antlers have the same configuration as other whitetails, with points typically growing upwards off one long main beam; females do not have antlers. Matching their smaller body sizes, Coues deer antlers are also much smaller than standard size whitetails with the largest antlers on record scoring 144 1/8 points, compared to the overall world record whitetail with an antler score of 213 5/8 points.
Coues deer forage in thickets of acacia, manzanita, mesquite and scrub oak. The deer’s diet also includes the fruit of cacti, Ceanothus, mountain mahogany and various forbs and grasses.
In the U.S., only Arizona and New Mexico hold hunting seasons for Couse deer. Because of the terrain they inhabit, a combination of traditional whitetail hunting methods and western hunting techniques used for mule deer and elk work best when pursuing Coues whitetails.
During morning and evening hours, when deer are feeding, setting up at the top of a south facing slope and glassing below can be highly productive. During midday, when deer are bedded, glassing with binoculars or spotting scope and stocking with range is the best option. Because most of the west is so arid, setting up by an active watering hole is highly productive. Unlike other species of whitetails, Coues deer are generally vocal throughout the day, making them susceptible to calling into range with snort and grunt calls. During the rut rattling antlers can be effective.
If seeking further Coues whitetail deer information, consult credible sources such as state fish and game departments.
What Weapon Will You Use?
After you’ve done some research, and before you get your tag, you need to decide on what kind of weapon you will use to hunt deer. This decision will depend on several different factors.
The first question to ask yourself is what are you comfortable with? Did you grow up around guns? Are you an ace archer? Whatever weapon you choose, you need to make sure you are more than fully comfortable with it.
Below are descriptions of five of the most common weapon types to use when deer hunting.
Rifle
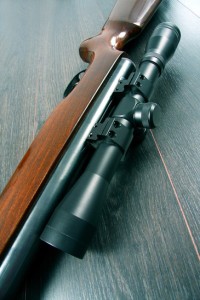 Rifle hunting is by far the most common, and for good reason. Rifles are powerful, relatively simple to use and maintain, and can be had for a low investment. They allow you to kill deer from long ranges, even beyond 500 yards if you are a very good shot and have a nice rifle. Even a novice hunter with a small amount of time spent on the range practicing can kill a deer from several hundred yards away with a rifle. This makes them an ideal hunting weapon for many.
If you are going to use a rifle, then picking the right rifle is a critical decision to make. There are many different choices out there, ranging from inexpensive packages to rifles that run thousands even without optics. Choosing the right rifle will come down to these things:
Pick a Caliber
The first step on picking your first (or next) deer rifle is to pick the right caliber to shoot out of your gun. This is the most crucial step of the process. Take the following into consideration when you pick yours:
- Are you willing to deal with kick? If you are, then you may want a meatier caliber (such as a 300 WSM or 7mm magnum). If not, pick something like a 270 Winchester or 243 Winchester.
- Are you only hunting deer with this rifle? If you’re also hunting other, larger game (such as elk), then choose a caliber that will also handle that. If you want to do some varmint shooting, choose something small, fast, and highly accurate.
- Is cost a consideration? If so, will you be reloading? Reloading makes things cheaper, and shooting the more expensive calibers (such as the short magnums) is much more cost effective if reloading.
Pick the caliber that fits you best based on those three conditions. I, personally, shoot a 270 WSM, but this is also my elk rifle. If it wasn’t for that, I’d shoot a 243.
Pick a Brand and Model
Next you have to pick the brand and model that you want to buy. There are many different options out there. To pick, weigh in these questions:
- Do you want a wooden or synthetic stock?
- How much weight do you want to pack around?
- Are you attached to a particular brand?
- And above all, how much are you willing to spend?
I am a big Remington fan, so my deer rifle is a Remington 700 SPS, which I think is a great all around gun for around $500 new. This is a very reasonable price for the gun you get. If I was willing to spend more money, I would get either a 700 Sendero, or one of the new Tikka tactical rifles.
Used or New?
Then you must answer the final question, used or new? There is definitely validity to both sides of that debate. If you want to break in the rifle yourself and know every detail of every part of that rifle’s life, then buy new. That’s what I typically choose to do. If you don’t care so much about that and want to shave some cost off of an expensive purchase, then buy used, just make sure that you buy from someone that you trust.
Buying a rifle for this year’s deer hunting season that you both enjoy shooting and is of good quality, will ensure that you only have to make this difficult decision once. It can be hard to pick the right rifle, but I hope that the advice above has helped you look at what counts in a rifle.
Scopes
Once you have your rifle you need to get a scope to mount on it. There are an innumerable amount of options out there, so do some shopping. Prices vary from $50 to $2000. The main difference will be the quality of optics, meaning the amount of light they let in and the clarity of the glass.
There are several things you should consider when you purchase a deer hunting scope. Get one that is simple. All the tactical knobs and fancy adjustment dials will do you no good in the field unless you are shooting from very long range. A simple reticle is best, as it provides you the most unencumbered view. There is much debate as to the best amount of zoom for a hunting scope. Most hunters, including myself, use a 3 – 9 power. Anything less than that isn’t enough for a long shot, and anything more is overkill for 95% of the shots you’ll take on deer in the
field. A 40mm lens is the most common, and works very well. If you would like a little bit more light coming through, a 50mm lens is a great option, but it will cost you slightly more. Scopes in general are more about personal preference than anything else. Whatever you can see through well that is in your price range is what you should use.
For a great resource on buying rifle scopes, check out OpticsDen.com.
Bow
 The next most common type of weapon for deer hunting is the bow. Archery hunting requires much more skill and practice then simple rifle hunting. This is both a deterrent, and for more many a huge incentive, seeing as it provides an extra challenge. In order to kill a deer with a bow, you will need to be very close, within around 50 yards, and often closer.
If you are going to hunt with a bow, you will need to first invest in quality equipment. Do some research and find a quality bow that will fit you well. Go to a big outfitter and find out what your draw length is, and what you can pull back for a draw weight. Once you’ve figured that out, decide what kind of bow you want to get.
The most common type for modern hunters is the compound bow. They look very complicated, but they are definitely more powerful and lethal than any other option. They are also much easier to be accurate with, which can be a big factor if you are just starting out in archery. Make sure you learn about all the accessories, as these are very important with a compound bow. Also make sure you learn the ins and outs of your particular model.
If you want to be more traditional, then you can get an old school long bow. They have no sights, can be very difficult to pull back and hold steady compared to a long bow, but many love them from a traditional sense.
If you want something of a compromise, you can get a recurve bow. They are similar to a long bow, but they have curves at the top and bottom, making the bow more powerful and efficient. They also usually have sights for aiming and rests that create less drag on the arrow.
Once you have the bow you want, and some broad head arrows, you should practice shooting quite a bit. It takes serious skill to shoot well, and a bow isn’t nearly as effective as a rifle. If you don’t hit the deer in the exact right spot, you may be blood trailing it quite a distance and you may never find it. It is well worth taking the time to practice if you are going to bow hunt.
Bow hunting also requires different hunting tactics than rifle. For the most part, bow hunters sit in stands at game trails and other areas where deer are likely to come by. Keep that in mind when deciding what kind of weapon you will hunt deer with.
Shotgun
If you think rifle hunting is too easy and bow hunting too difficult, then this may be your perfect option. Shotguns are firearms, but they lack the range and precision of a rifle. Shotguns are most often associated with bird hunting. However, if you load them up with slugs, they become very effective deer guns. If you do choose to hunt with a shotgun, make sure you check the laws in your area. In some states there is an entirely separate season for shotgun hunters.
A shotgun is typically cheaper than a rifle seeing as you wouldn’t normally buy a scope. Shotguns with slugs have a range of around 100 yards, 150 if you have an ideal setup, so there is no real need for the magnification of a scope. This does save money, and can add an increased challenge to your hunt.
Muzzleloaders
An alternative, yet similar method to the shotgun is muzzleloader hunting. Again, make sure you check with your states laws first. A muzzleloader is what it sounds like, a gun that you load from the muzzle. That means you only get one shot at a deer, as reloading takes quite some time. The strategies you use will be similar to hunting with a bow or a shotgun; the main difference will be that there is almost no chance for a second shot.
Crossbows
The last weapon on this list is the crossbow. In many respects, it is similar to the last two weapons, so I’ll be brief. Again, check the legality, and know that you may not get a second shot with this type of weapon. However, it can be an effective way to deer hunt.
The Essential Equipment
According to some hunters, the only essential deer hunting equipment is a rifle and ammunition. However, if you want to have a safe and successful hunt, there are a number of pieces of gear that can help substantially. Here is a look at some of the most important equipment for any successful deer hunt.
Proper Clothing
It may seem obvious, but many hunters don’t pay nearly enough attention to the clothing they wear in the field. The first and most important consideration is the weather. Planning equipment for a hunt should begin with a survey of the local climate. In particular, attention should be paid to the average temperature for the time of year, typical chances of rain or other inclement weather and advanced forecasts if available.
When hunting in a location where cold weather is expected, dressing in layers is essential. An excellent first layer is a pair of long underwear. Even when cold weather is not expected, layering can be beneficial because it allows a hunter to add or remove layers to remain comfortable regardless of the conditions. While hunting in areas of excessive heat, clothing should be lightweight, loose-fitting and breathable. Clothing that wicks sweat away from the skin is also a good choice. Some such clothing has the added benefit of neutralizing the smell from sweat, reducing the chance of being detected by deer or other animals.
Because deer have extraordinarily sensitive hearing, all clothing should be made from material that makes as little noise as possible while moving. Natural fibers such as wool and cotton are generally the best choice, while materials such as nylon and denim should be avoided. Wool is typically the best overall choice for clothing because it is effective at regulating temperature in both warm and cold climates, it performs well in wet conditions and, despite taking longer to dry, it often feels drier on the skin than other materials.
The final consideration for clothing is a quality pair of boots. Because each individual is different, there is no right or wrong answer here. The important thing is to find a pair of boots that is comfortable to wear for long distances. A great test is to wear the boots on a long hike. After the hike, there should be little or no foot discomfort. The preferred material is Gore-Tex since it helps protect the feet from water and snow.
Knives
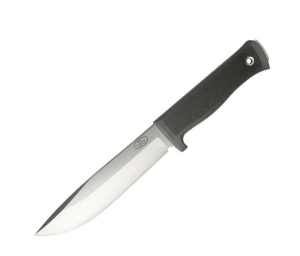 Although many hunters can and do get by with just one knife, carrying two knives can prove very useful. While one blade can be used for field dressing deer, the other should be better suited for survival and other tasks hunters may be faced with. For field dressing, the ideal knife is thin easily maneuvered. Some people even prefer very small knives for field dressing, despite the large hunting knife stereotype. While fixed blades are sturdier, a folding blade design will also work well and be safer and more convenient to carry. Here is a resource with some great folding knife recommendations.
The second, larger knife should have a blade of at least four inches and be of fixed-blade design. This knife can be used for cutting rope, chopping wood, butchering game animals and a variety of other tasks. Hunters must be prepared to survive in the woods should they get lost or blocked in by weather, and a large knife is perhaps the best survival tool available.
There are many knives out there that can fill both requirements, which will mean less to carry.
Binoculars
Hunting can only be successful if the game is able to be seen, and to that end a good set of optics is crucial. Because of the extreme sensitivity and fickle nature of deer, being able to see them from great distances can be a huge advantage. When choosing optics, low-light performance is perhaps the most important consideration. Deer tend to be most active at dusk and dawn, so hunter’s optics must perform well in these conditions. Binoculars with 42-50mm objective lenses are a popular choice for this application. If you want to find the best pair of binoculars to purchase for hunting, check out the guide on OpticsDen.com.
Magnification depends upon the area being hunted. When cover is ample or sight lines are frequently limited, a lower magnification power with a wider field of view is best suited for the job. For open, rugged areas with little cover, a higher magnification is necessary. Magnification power greater than ten is difficult to hold steady without the use of a tripod, however, so a balance must be struck between image quality and magnification power.
Additional Supplies
The final pieces of essential deer hunting equipment are several items that can be carried in a fanny pack or other small carrying space. These items are intended to be useful not only for the hunt, but also for survival if it should become necessary. The first item is a 50-foot length of parachute cord. This cord is small, lightweight and incredibly strong. It is strong enough to hang a deer, and it can also be taken apart to access its several smaller component cords. These smaller cords can be used for shelter construction, traps and many other things.
A GPS unit is an excellent addition to the kit and should be included if possible, though a functioning compass is a suitable substitute. A small map of the hunting area should be included as well. Safety and survival equipment should include a small first aid kit, snake bite kits if necessary, odorless insect repellant, water purification tablets, a space blanket, cable saw and a small flashlight. Finally, some means of starting a fire should also be included. There are a number of options for this, including lighters, matches, and chemical fire starters. Perhaps the most reliable option, however, is a flint fire starter.
Ultimately, there is an almost endless variety of equipment and supplies that can improve the hunting experience and make it safer. There is rarely a single correct choice, and it depends greatly on the needs and abilities of the hunter. One hunter’s essential deer hunting equipment may be unnecessary to another. However, the equipment items listed above are perhaps the most important pieces to ensure a safe and successful deer hunt in nearly any location.
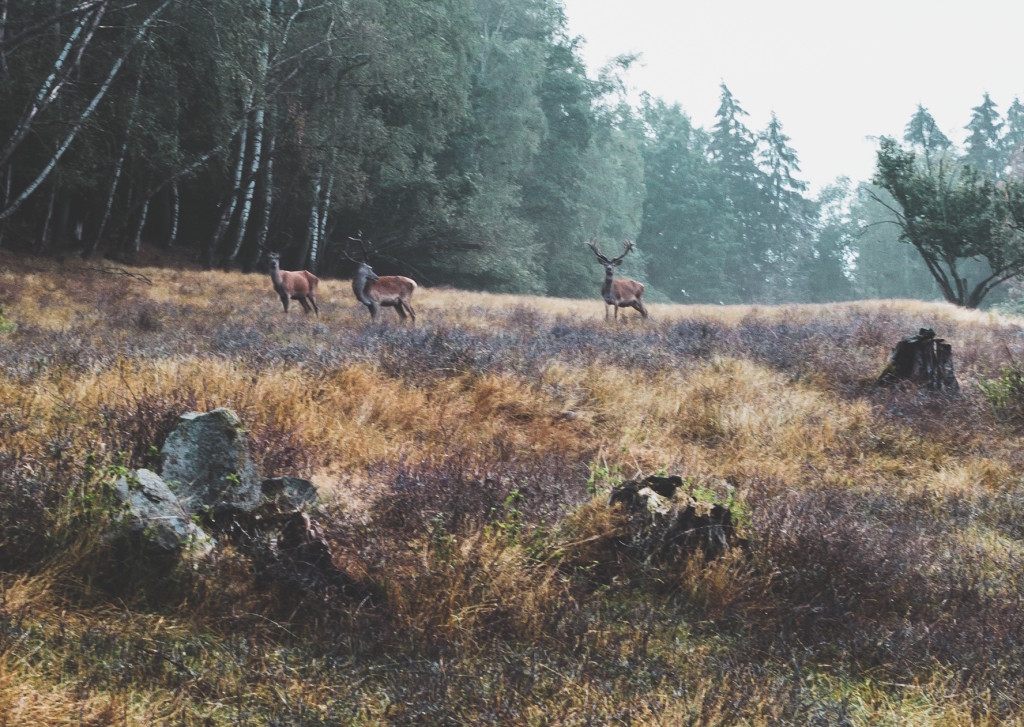
Scouting for Deer
Deer scouting techniques are as varied as are species of deer and the habitats in which they live. For instance, scouting for mule deer in the thick chaparral of southwest Texas, where visibility and accessibility are nearly zero at ground level, is going to require a different approach than scouting for mule deer in canyon country where you can see from horizon to horizon.
Obviously, in thick chaparral, deer scouting techniques will require you to find a vantage point where you can view a source of attraction for the deer to come to, such as food or water. This is why blinds on tall telescoping scissors are so popular for hunters in this part of the country.
Check first with your state’s hunting regulations before you put out deer attractants like salt blocks or feed. Doing so is strictly prohibited in many jurisdictions and you could find yourself on the wrong side of the law.
The best possible deer scouting technique is the actual time you spend in the field prior to deer season, walking the fields, observing the woods, looking for deer and their signs. Where the buck rubs are located, a buck has clearly marked out his territory, and the higher the rub, the bigger the buck. Look for deer tracks around the rub and on the game trails. If you have a game camera, this could be an ideal place to set it up. If you don’t have a game cam, consider raking an area of soft ground on the game trail or near a water tank and return frequently to see if deer are using it. Water tanks and preferred food sources are also ideal locations for game cams.
Game cams can be your eyes and even ears for your deer scouting techniques out in the field when you can’t be there. The cost of a good, inexpensive game cam starts at around $120.00. At that price, you basically get a motion sensor and maybe a 2.5 megapixel digital camera in one. But it doesn’t cost much more to upgrade to a better unit. Today’s top shelf game cams are not much different from the hi-tech surveillance cameras used in high crime areas in the city. Costs of the better units can run $500 or more. These cams can come equipped with microphones and broadband Internet connections so you can see the video in real time. Manufacturers have made these cameras incredibly stealthy, too, by making them remarkably quiet and nearly invisible to game. LED lighting, infrared and night vision are replacing strobe flashes because the flashes scare away game. Even the cheaper game cam models come with expandable memory and auxiliary power jacks, allowing the deer scout to leave the camera unattended much longer in the field.
For those deer scouts unfamiliar with the game cam, start with a more affordable unit, but one that allows a memory card and has an auxiliary power jack. Nothing can be more frustrating than getting back out to the field after setting the camera up, only to find the batteries died at some point or the memory is full and you don’t have any idea what great pictures you may have lost. Having more than one game cam is also a good idea. The effective field of vision for game cams is only about sixty to eighty feet in daylight, and much less at night. Why monitor only one area if you can afford to monitor several? It’s also a very good idea to get familiar with your game cam around the home, long before you burn your precious time and fuel heading out to the woods with a camera you know nothing about. Read the manual and know the settings so you won’t be disappointed once you have set it up in the field.
A good deer scout knows the game he’s scouting. He knows the deer’s sense of smell could be a thousand times better than his own. Before heading to the field to scout, bathe with odorless soap. Wash your cloths in odorless detergent and don’t smoke or use any aftershave or scented antiperspirant. Be aware of the wind directions in the field and try to stay downwind of where you hope to see deer.
Keep in mind that a deer’s vision is poor when it comes to discerning unmoving objects, but its vision does allows it to see movement at a great distance. Once a vantage point is found, be still, very still. If possible, move only your eyes and don’t raise your binoculars quickly if you need to use them. If standing, be motionless against an object like a tree, and keep very quiet. Don’t stand with your legs apart, keep them together. Your legs apart look like an inverted V, and this shape very rarely appears in nature. Deer are color blind, so wearing camouflage in the field is not much of a benefit. Camouflage is even illegal to wear in some states and you may be required instead to wear a certain amount of hunter orange.
Before deer scouting anywhere, show friends or family a map of where you plan to go, and tell them when you will return. Prepare for foul weather with adequate clothing and make certain ahead of time that your vehicle is up to the task and the terrain. Take a GPS along and know how to use it in advance. The GPS will also come in handy for flagging any spots where deer activity is observed. Take enough food and water to last beyond the number of days you plan to be gone. Pay your cell phone bill, and make sure the batteries are fully charged. Take a flashlight, spare batteries and lighters.
On the Hunt
Now that you’re prepared for your deer hunt, it’s time to learn what to do when you get out there. Deer hunting can be very exciting, with some tense action when you do spot deer, but it also can be dangerous. Make sure you read the chapter on weapon safety, regardless of how experienced you are with guns. It is never harmful to get a reminder.
Hunting is a skill, so read the tips provided in that section of the book. However, know that to be a successful hunter, you will need practice and experience. No matter how much you read, you need some in the field experience. I highly recommend you go with an experienced hunter the first time you go out. It will help you tremendously.
Weapon Safety
Weapon safety is the absolute most important thing to learn when getting started in the hunting world. Some meat in the freezer isn’t worth accidentally putting a bullet through your own leg. Read over these basic weapon safety rules regardless of whatever weapon you choose to hunt with; they apply to anything.
- Always keep your weapon pointed in a safe direction. No matter what you’re doing, even if you’re walking with it and it’s hard to avoid, always point it somewhere safe.
- Always keep your finger off the trigger until ready to shoot. Even if your finger is just barely touching the trigger of your gun, it still poses potential danger for a misfire.
- Keep your weapon unloaded until ready to use. Especially during transport, there is no need to keep a weapon loaded until you are actually about to use it.
- Always treat the weapon as if it is loaded. This will help you establish good safety habits, and your weapon will never endanger another.
- Know how to use your weapon completely and safely. Know the ins and outs of the weapon so that if something stops working, you know exactly what it is and how to take care of it safely.
These five rules are a great foundation to build up good weapon safety habits. If you want to learn more about it (and you should), here is a great resource:
Techniques
Below are six of the most common deer hunting techniques. When deciding which one to use, think about where you will be hunting, and the habits and movements of the deer you’ve been spotting.
Stand Hunting
As deer possess extraordinarily sharp senses of smell and hearing, locating a likely looking ambush spot and then letting the deer come to you is perhaps the most productive of all basic deer hunting techniques. Working in all types of cover, from thick brush to open meadows and parks, stand hunting is effective for all deer species. Stand hunting works especially well when the woods are dry and noisy, or if the hunter is unfamiliar with the territory or terrain.
For stand hunting to be productive it is necessary to locate an area where there are obvious signs of deer activity. Look for spots where two or more trails converge, with fresh hoof prints along both trails. Locate feeding areas, such as apple orchards, crop fields and oak trees. During the rut, or breeding season, look for places where a buck has marked his territory by making scrapes, patches where the deer has dug down to the bare earth with its hoofs, or rubs, spots on trees where the buck has removed the bark with its antlers. Additionally, if water is scarce in an area, a water hole can be a productive place to wait. Locating two or more indicators in the same area is a sign of an ideal place to post a stand.
Select a stand location that offers a good vantage point, such as on a hill overlooking the area deer are expected to be moving through. Sit up against a tree or make a ground blind out of natural materials, such as dead tree limbs, to breakup your outline. Tree stands can be highly productive, providing a superior vantage point of the surrounding area and will keep human scent off the ground. However, use caution as many hunters are seriously injured every year by falling from tree stands; be sure to use a safety harness at all times when climbing and in a tree stand.
Still Hunting
Requiring the patience of Job to be successfully executed, still hunting can be very effective. Still hunting requires moving through the woods at a slow and methodical pace. The goal in still hunting is to move slowly enough so that the hunter sees the deer before the deer spots the hunter. However, the problem with still hunting is that most hunters become impatient and begin moving too fast, spooking the deer before they get close enough for a shot.
Ideally, still hunting is done by taking three very quiet and slow steps, avoiding any ground debris or overhanging branches that have the potential of making any sound whatsoever. The area is then looked over inch by inch, preferably with binoculars, looking for any signs of deer, before taking another three steps.
Spotting and Stalking
Best suited to open areas where deer can be seen at a distance, spotting and stalking is exactly as it sounds. Setting up on a vantage point that provides a good view, the hunter thoroughly examines the terrain with binoculars or a spotting scope. When spotting, a hunter must look for anything that could give away the deer’s presence, such as the glint of light off an antler or eyeball. A highly successful spotting technique is to look for birds on the ground. As birds are obviously smaller than deer, any deer will stand out like a sore thumb.
Once a deer is spotted a stalking route must be carefully planned out to keep the hunter hidden while approaching within range, taking advantage of all available cover such as ravines, dry washes, crop fields and stands of timber. Spotting and stalking is highly effective during midday hours, when animals are bedded. Additionally, spotting deer in the morning, while they are on the move, and waiting for the animals to bed down for the day can also be a highly productive strategy.
Tracking
A combination of spotting and stalking and still hunting, there are two methods of tracking. The first involves cutting a fresh set of tracks and slowly following them, in still-hunting mode, until the deer is found. The second tracking technique requires a level of physical fitness that few hunters possess. Once a set of tracks is discovered, the hunter literally starts running on the trail until the deer is caught up with. The hunter then gives the deer 15 to 20 minutes to settle down and then begins still hunting. Tacking works best after a new snowfall or rain when the ground is soft and quiet.
Drive Hunting
Drive hunting requires a group of hunters and a small section of land. The majority of the hunters, known as the drivers, take up positions forming a semi-circle around one end of the targeted area. The other hunters, generally two to four depending on the size of the group and the plot of land being driven, are called the standers or blockers. The standers take up positions at the far end of the area being driven and wait for the driver to push the deer to them. Overall, drive hunting is not as effective as other methods, as deer are highly skilled at slipping between the drivers. Additionally, all drivers must use extreme care not to shoot in the direction of the other drivers, often preventing them from taking shots themselves. One drive technique that does have some success is posting trailing hunters behind the drivers, who will often catch deer trying to slip backwards through the line of drivers.
Jump Shooting
A final basic deer hunting technique involves walking through an area with thick cover, such as a corn field, and shooting the deer as they jump up to run, usually with a shotgun. Because there is often little or no time to identify if the deer is a buck or doe, jump shooting is most effective in areas where it is legal to shoot either sex. Also because of safety issues, jump shooting should only be done on private land where there are no other hunters present.
Making the Kill
 You’ve done your job, you put out the effort. You picked a good spot, used the right technique, and there is a deer in front of you. Now what?
First off, calm yourself down. In the heat of the hunt and the excitement of seeing an animal, it’s easy to get over excited or anxious. This can cause you to take shots that aren’t good shots, make lots of noise accidentally, and many other things that will stop you from getting the kill.
Second, get your weapon ready. If you are hunting with a rifle, you should at least have it loaded at this point. Now chamber a round, take off the safety, and look through your scope at the animal. If you’re using a bow, nock an arrow if you haven’t already, pull back the bow, and find the deer in your sights.
Once you’re ready to shoot, don’t right away. Take a second again to calm your heart down. If you are shaking at all, take the time to let it calm down. You want a good, clean kill shot, not an injured animal.
Now, aim for the vital areas. These are going to be primarily towards the front of the animal, where the heart and lungs are. If you are a very good shot, you can also aim for the head or neck areas. Just know that they are smaller targets and much easier to miss. If you shoot a deer in the chest with a powerful weapon, it will almost surely die quickly. The key is to hit it right in the vital
area. This will be right behind the front leg, in the middle of the body.
Try to avoid hitting the deer in the guts. This means the back half of the deer’s body. If you do, you run serious risk of soiling some of the meat when the contents of the guts are released into the animal’s body. It also won’t be a clean kill, with the animal suffering unnecessarily and oftentimes running a significant distance before dying.
Blood Trailing
Sometimes, the kill doesn’t happen quite like you’d like it to. You hit the deer, but instead of dropping dead, it sprints off. You watch it go, but it quickly disappears behind some trees or on the other side of a hill. You have no hope of catching up with it, so your only option of finding the animal is to blood trail it.
Blood trailing is exactly what it sounds like: following the trail of fresh blood a wounded animal leaves behind. Blood will tend to spray pretty profusely from a gunshot or arrow wound, so often times it’ll be easy to follow a trail of blood. That isn’t always the case however. Some blood trails can have huge gaps in between the spatters of blood, and be in small amounts and hard to see.
First, find the point the deer was shot at. You should see some telltale sign there, such as a blood pool. Then start walking in the direction the deer ran in. Typically they run in the direction they were facing when hit. Look for blood as you walk. If you haven’t seen any in awhile, you may be missing the trail, and need to turn back to head in a different direction.
Deer like to take the path of least resistance when wounded. A meadow is much more appealing than a thick forest. Running downhill is much easier than up. This isn’t necessarily a rule, but it is definitely something to consider if you are having a hard time finding the trail.
Another thing to do when blood trailing is to keep your sense of smell fully engaged. Often times you’ll smell the deer before you see it, especially if you hit it in a not ideal location like the guts. I once shot a deer in the lower stomach area, and had to blood trail it. I had lost the trail for a little bit, but then smelled something that was clearly not supposed to be there. Sure enough, I looked around a tree, and there were the poor animal’s guts in a nice pile where they had fallen out while he ran. From there, it was easy to track the rest of the way, and I quickly found the animal.
Blood trailing is not something you want to do often, but it is something you should always be prepared to do. Hopefully you are successful in making clean kills, but if worse comes to worst, be ready to spend some time finding that animal whose life you took; it is well worth the effort.
After the Kill
So you made your big kill. You were well prepared, had the perfect spot scouted out, and found your deer. Your weapon came through, the target practice was all worth it, and you made a clean kill, and found it without a problem. Now you have a dead deer lying at your feet. What next?
First off, if you packed a camera, take some pictures if you want. You’ll never get another chance to get a picture with that deer once you’ve started cutting it up. What you do next will depend on if you are going to drag out the entire deer or pack out the meat. Either way you need to field dress/gut the animal. If you are packing it out you will also butcher it on the spot.
Once your home, you will have quite the task ahead of you to process the meat, hide, and antlers into what you are going to use them for. Read these chapters thoroughly, and do any additionally needed research.
Field Dressing
The kill is often considered the most exciting part of deer hunting, but most people are not doing it for the fun. The truth is that many families rely on the meat to get them through the long winter months. This is why it is so important to learn the proper way to field dress a deer. One mistake could mean many pounds of lost meat.
After the deer is down, you want to make sure you are in an area that will allow you to field dress the deer comfortably. If you are not, drag the deer to flat area. For safety measures, hang something orange to a tree branch over the top of where you will be working. This will allow other hunters to see you.
The deer should be propped up on its back, which will allow you access to the chest and abdominal region. Using a sharp knife, you will start by cutting just below its sternum and all the way down to the genital region. Just be sure you are not cutting too deep; you just want the knife to go under the hide and its stomach muscles.
When you reach the genital area, you will need to cut around both sides. This will prevent you from cutting into the bladder and ruining the surrounding meat. For a buck, you will have to first cut the base of the penis and
testicles. For a doe, you will need to cut around the vaginal area and anus.
Before you do anything else, you will need to cut out the anus and tie off the intestines inside the deer. If you fail to tie them off, fecal matter will leak out and the meat will become tainted. With a doe, you will also need to cut and remove the reproductive system with the bladder.
By rolling the deer to its side, the entrails should simply slide out of the cavity and onto the ground. You will need to have your knife ready to cut any connective tissues that are still keeping them attached to the inside of the body.
The next step is to clear the chest cavity. Start by pinching or tying off the deer’s esophagus. You can then remove this along with the stomach. When this is done, cut the diaphragm away from the ribs and reach up to pull down as much of the esophagus and windpipe as possible. Cut this and remove it.
If you plan to save the heart and liver, you will need to remove these when you roll the deer back to its side to empty the contents of the chest cavity. These organs should be placed into a clean cloth or plastic bag after their removal.
After you have cleaned up, you are ready to haul your deer home to butcher. However, many people are often disappointed by the amount of meat they actually yield from their kill. On average, about 40% of a deer’s weight will turn out to be meat. In other words, if you have a 100 pound deer, you should expect to see about 40 pounds of meat.
Due to the fact that only about 40% of your deer’s weight will be meat, you need to be very careful when field dressing the deer. Busting open the intestines or bladder can ruin a lot of it, but you also need to be careful when you get home. Hanging the deer to let the blood drain off is important, but you have to be aware of the temperatures. A deer hanging in temperatures above 50 degrees Fahrenheit will quickly spoil your meat for consumption.
This was a quick overview of the process of field dressing a deer. If you want to watch a video, which I highly recommend you do before you attempt this, here are a couple of good ones:
There are plenty of resources online about this topic. If you need more information, do some searching around. This is one thing that you do not want to mess up on your hunt.
Dragging and Packing
Honing your hunting skills also includes knowing the proper deer packing process. An experienced hunter not only knows how to make the kill, but is skilled in packing out properly and transporting the deer as well.
Once you’ve field dressed the animal, you can either butcher it in the field, or drag out the entire animal. Most often, people will drag out the entire animal. This allows them to butcher the animal in a safe and clean environment.
A quality constructed hip harness will make for a great investment for dragging your kill from the field. When horses and cart mechanisms are impractical or unavailable, a sturdy hip harness is easier on the body and requires little equipment haul.
Some hunting enthusiasts enlist the help of a specially designed cart for the purpose of carcass transport. Many sporting goods stores provide a wide variety of models to choose. This process allows for easy transporting of an entire deer, saving cutting for a later time and location.
Butchering in the field and then packing out your deer is time intensive and requires a level of patience and skill but will save on hauling heavier weight. Tying a rope around the deer’s back legs and securing it to a tree is the first step. Make sure no part of the animal is touching the ground. Gut the deer starting from the belly and ending where the last rib is located. Be sure to cut through the hide continuing to the anus. Completely sever any skin still holding the anus in place and reach into the cavity. After removing the entrails slice away any remaining organs still connected to the carcass. Leave any bones and entrails for scavengers.
Skinning the deer starts with a cut at the top and continuing to the first joint for each leg. From this cut, slice through each leg returning to your initial cavity cut. While pulling on the hide delicately slice the membrane and continue the process until the only connection of the hide to the animal is around the neck area. Sever the head as well as each front leg from each top joint. Remove the feet and continue to remove the mid-section, rib meat, etc. until you have removed the prime choices of meat. Severing the spine will help to remove the rear legs. Always securely wrap your meat in industrial strength plastic bags and finish by securing them closed with high quality tape.
Acquiring excellent pack out skills will ensure optimum meat condition and makes the process much easier to execute properly. If you use a wheeled cart pull or hip harness, properly wrap your deer to ensure no damage to the hide. If you’re going to butcher it in the field, make sure that all the meat is wrapped well in plastic bags before putting it in your pack.
Meat Processing Basics
Now that you have your deer out of the field, it’s time to process the meat. You can pay someone else to do it for you, but I don’t recommend this. It is easy to do yourself, and then you know exactly what is happening to your meat.
Proper Aging of Venison
You do not want to begin butchering your deer until after the muscles have had a chance to finish the rigor mortis process, which is when all the muscles and tendons stiffen for about twenty four hours. Trying to butcher during this time will cause the muscles to toughen and the meat will not taste as good as it would if you had waited just another day.
Remember that aging meat is in no way controlled rot. To properly age meat, you need to hang it in a cool room, below 40 degrees Fahrenheit but above freezing, to prevent the growth of bacteria and allow the enzymes to do their work. As an animal matures, it develops collagen, which causes toughness. Hanging the meat allows the enzymes to break down the collagen, making the meat much more tender. It may be difficult to find a place to maintain a temperature according to the guidelines for a week or more, but if it is possible, that duration of time is the best to produce quality meet.
How to Cut Venison
When you are preparing to butcher a deer, you should always keep safety in mind. Research any diseases that might be prevalent in the areas you are hunting. Since it is impossible to know from looking at the animal if it is infected, always use caution around any spinal or brain fluids, and consider using gloves to prevent the spread of pathogens.
If there is no threat of chronic waste disease in your area, the first step will be to cut the carcass in half. If there is a threat, leave the ribs intact and attached to the spine, and just cut any meat away from them before you throw them away. You should then remove the hind legs by cutting carefully around the joint. Many people like to remove the loin next by cutting carefully along the spine, followed by removing the two front legs. The neck and meat near the leg joints, along with organ meat, can all be used for stews and similar cooking. To help make your meat tenderer, try to always cut against the grain. After you have cut up the animal, use quality butcher paper to wrap up the meat and store the remaining parts in the freezer. Always be sure to mark what it is with the date so you use the oldest meat first.
How to Grind Venison
Ground meat is an excellent way to store the meat and make fresh burgers and other ground meat dishes. It is recommended that you grind up the meat when it is as fresh as possible for ease and maximum taste.
Additionally, some find it easier to grind the meat when it is partially frozen. To prepare the meat this way, you do need to purchase a meat grinder, and they come in different sizes and strengths. Choose one that best suits how often you plan on grinding meat and the amount you are willing to spend. If it is going to be very infrequently, you can also consider speaking with a butcher to see if he can help grind the meat for a fee.
Venison is popular, tasty meat enjoyed by many. It is commonly acquired through hunting, leading many people to figure out the best way to handle the preparing of the meat. Hopefully this offered some guidance as to the preparation, butchering, and grinding of the meat so it can be stored for enjoyment.
What to do with the Hide
Once you’ve dealt with the meat, it’s time to do something with the hide. Many people simply throw them away, which makes sense for some since they aren’t worth much and don’t serve too many practical purposes. However, you can tan your deer hide and have a nice piece to remember your deer by and maybe use for some sort of project or decoration. Tanning a deer hide is the process used when seeking to preserve the skin of the deer. This process will vary depending on the type of hide you are tanning.
Dry Scrape Tanning
This process involves drying out the hide on a pre-built frame. The hair and grain are hand scraped with a sharp tool. This particular method may be difficult and time consuming, however, the process assists in thinning the hide as well. Although tanning a deer hide using this method is possible, thick hides such as buffalo and bear are preferred.
Wet Scrape Tanning
Wet Scrape tanning involves the wet hide being scraped with a dull tool versus a sharp one. The process requires faster scraping motion in order to have optimal brain penetration. This requires no pre-built frame and leaves few if any tool marks. The wet scraping method is preferred for thinner hides such as deer.
Bucking
Bucking involves a soaking process in a solution of alkaline. Once the hide has shown optimal swelling, you may start the wet scrape process. After rinsing the hide, it may be sufficiently dried. The bucking process allows for optimal brain tanning, if that is the rout you want to go. The alkaline mixture also sterilizes the hide while providing easier grain access. This process involves an extremely large quantity of water.
Pre-Smoking and Smoking
Pre-smoking starts by soaking the hide in water followed by a brain soaking. This process then involves slowly working the hide until optimally dried and placing it in a quality smoke house. Many who use this type of tanning consider it the perfect technique for producing a quality soft-textured hide.
Fur Tanning
Tanning a hide with the fur on is a long process and may require as much as eight to ten days. After removing any remaining flesh, a clean deer hide is then thoroughly soaked in a salt/alum/water mixture for up to ten days. Once the soaking process is complete, a thorough rinse is required and the hide is securely adhered to a clean, dry board with the skin facing the board side. After the skin has reached a nearly dry condition, the hide is rubbed with hide oil. After lightly moistening the hide, a follow-up rubbing process is required. This thoroughly softens the skin texture. It is important to apply this step to the skin side of the hide only. Once you have lightly sanded the skin with a fine grade sand paper, your hide is complete.
All of these processes require patience, knowledge, technique and skill. Enlisting someone who is trained in the process is helpful. Allowing an experienced tanner to supervise your initial tanning process will ensure no damage or mistakes are made to the skin. If you are unable to locate an experienced individual who will guide you through the process, it is highly recommended that you bring your hide to an experienced tannery for optimal results.
The Rack
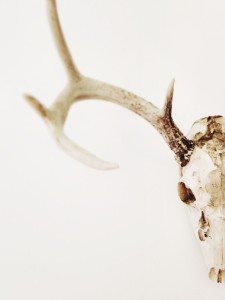 Once you’ve dealt with the hide, you now get to work with the real trophy. Assuming you killed a buck, you’ll have a nice rack to mount on your wall. You have several different options for mounting the antlers, so do what you think will look best in your setting and will be easiest for you based on your experience/capabilities.
European Mount
This is the most traditional look. It involves cleaning the entire skull of the animal with the antlers still on, and then mounting it as one piece. Be forewarned, this process can get messy, and if you’re the kind of person that gets grossed out by brains, I would recommend a different option described below.
There are two ways to do this. The first is to bury the entire head in your backyard, and let the flesh decompose for at least several months. When you dig it up in the spring/summer, it should be relatively clean. There are drawbacks to this however, like the risk of the antlers being damaged while the head is buried.
The second is to go ahead and boil/remove all of the flesh from the head right away. Start by removing as much of the skin/flesh from the skull as you can with a knife. The more you get off now, the less it’ll stink later. After you’ve done that, you’re going to boil it in a large kettle with a low concentration of bleach water. DO THIS OUTSIDE. It smells horribly. Once you get your water to a boil, hang the head with a rope so that it is fully submerged in the water, but not touching the bottom. Let it boil for around an hour; then let it cool for at least 15 minutes. Scrape off any remaining flesh and brains. Much of the brains and the eyes should have fallen off during boiling. If not, use whatever tools necessary to get them out. After that, some people recommend a second round of bleach boiling, while others say using dry boric acid overnight is best. Do whatever you feel most comfortable with. Once it is completely clean and sanitized, it is ready to hang. You can easily put it on a plaque to add to the effect, or just hang it as is on a wall. If you are willing to put in the
work, a European mount will look fantastic.
Mounting Kits
Another great option for making a display out of your antlers is to use a mounting kit. This will allow you to skip the boiling process, and still have a professional looking display. These kits come with instructions to easily use. Here are a couple of examples:
Hunters Specialties Deer Antler Mounting Kit
Walnut Hollow Antler Mount Kit – Oak
Other Options
If you don’t want to actually mount your antlers, there are plenty of options. There are an innumerable amount of crafts you can make with your antlers. I have an antler letter opener that I use every day. You can also make jewelry, chandeliers, candle holders, furniture, and virtually anything else you can think of. You are only limited by your imagination!
Conclusion
Well, almost 12,000 words later, that is a wrap. Hopefully you picked up a few useful bits of information from this guide, and you’ll be successful in your future hunts because of it. Be sure to contact us and let us know how your hunting season goes, we love to hear from our readers!